How to Build a Customer Support Triage Agent in CogniAgent: From Inbound Message to Routed Ticket
 Jun 26, 2026
 5 min read
 Jun 26, 20265 min read
If your support inbox is one undifferentiated stream — urgent outages mixed in with password resets — you don't need more agents answering tickets. You need something deciding which agent should handle each conversation. That's a triage agent, and in CogniAgent it's built as a parent-child chain of actors, connected by Activation Conditions, and configured through Context, Instructions, Definition of Done, and Focus Mode.
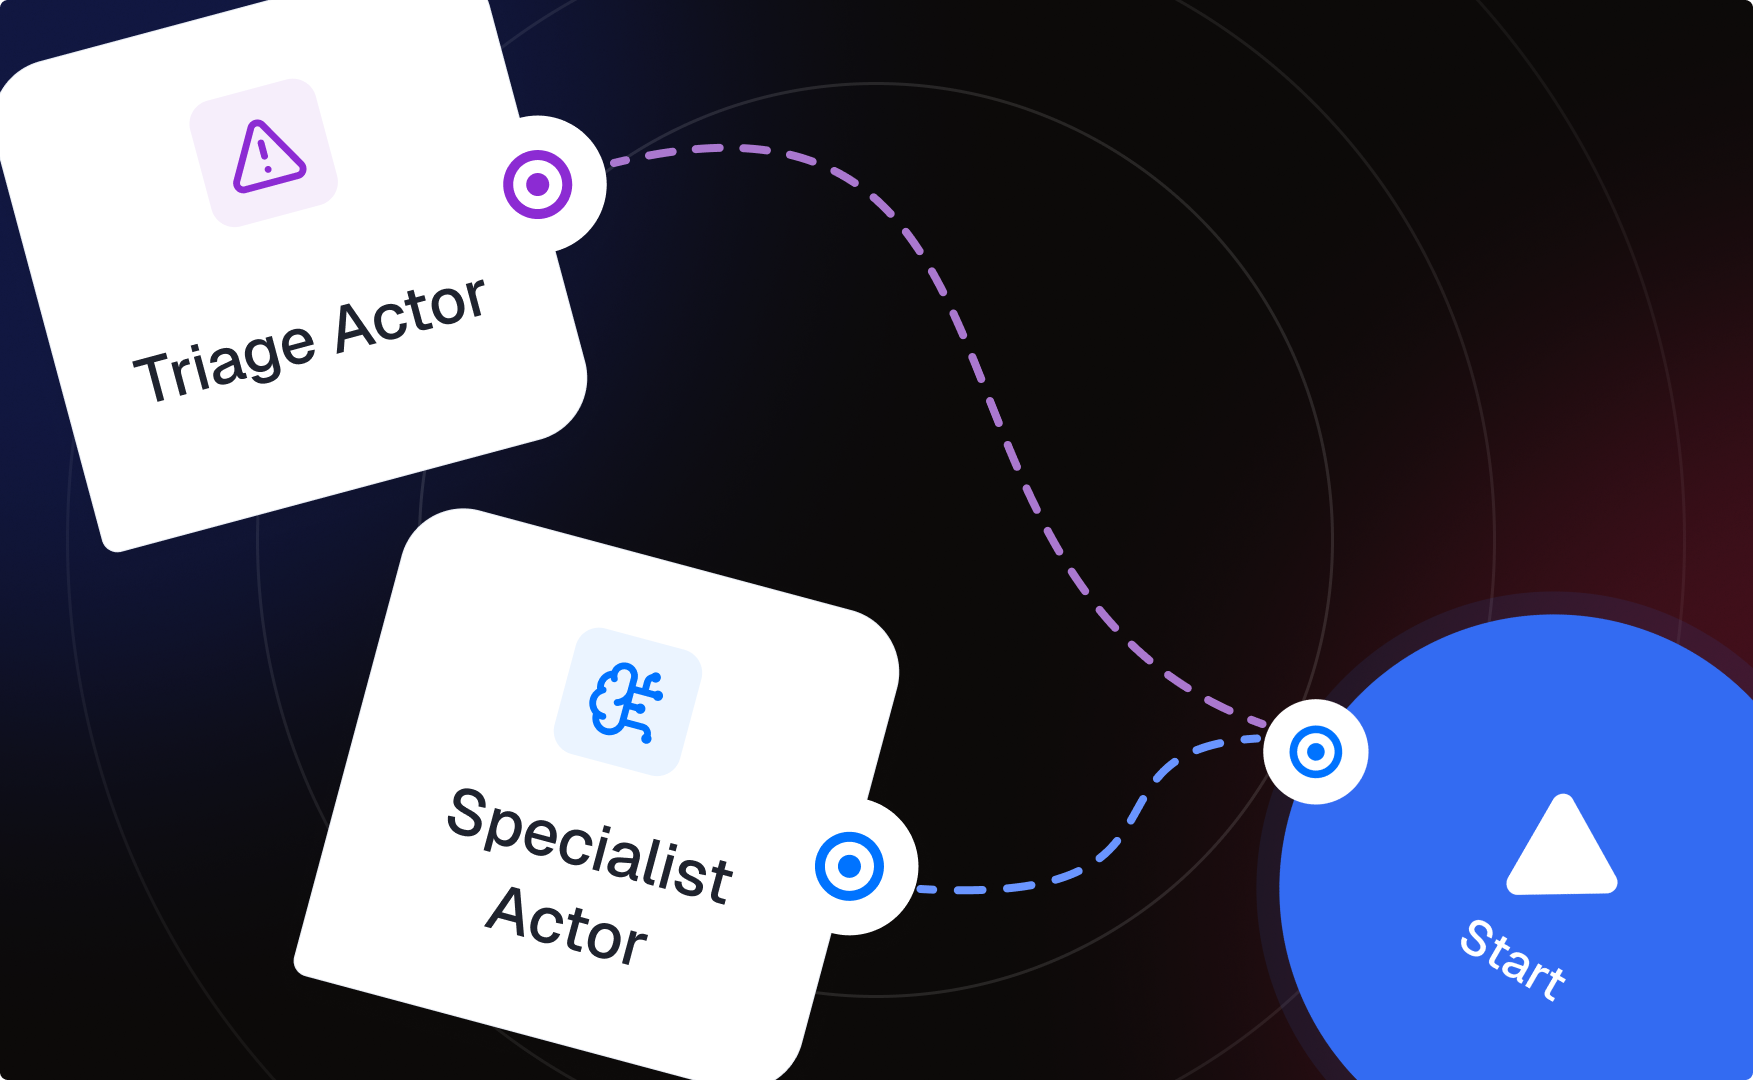
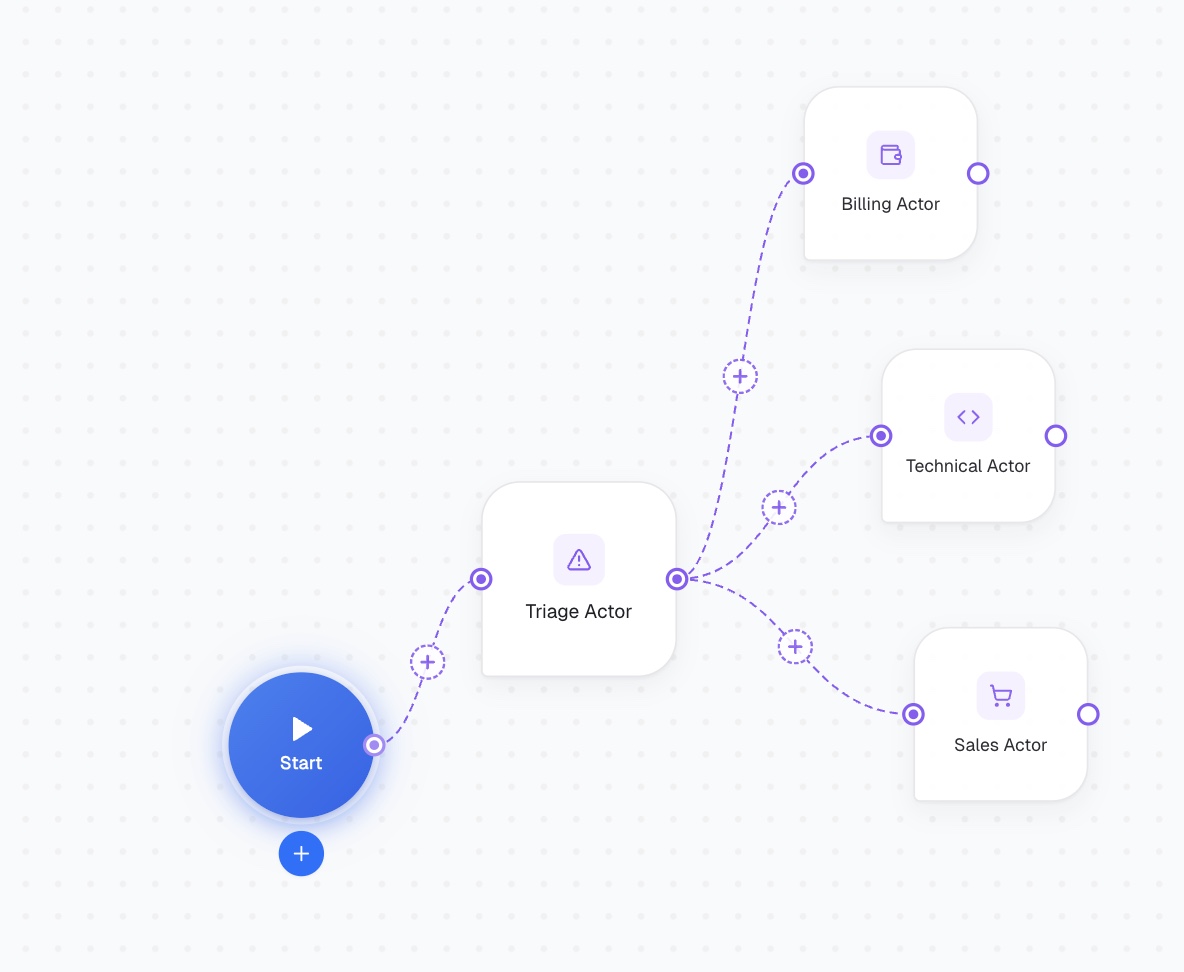
In the builder canvas, this is branches fanning out directly from Start to Triage Actor, spanning into more specific actors:
Before wiring up actors, open Flow Settings -> Channels -> Add Communication Channel. This is set at the flow level, not per-actor — every actor in this workflow shares the same intake channel. For a support triage flow, Widget (website chat widget) is the simplest place to start, since it's where most inbound support conversations begin and doesn't require external API setup like Twilio SMS or Gmail. You can always add Gmail, Slack, or Twilio SMS as additional channels later — Flow Settings supports multiple instances of the same channel and a mix of channels at once. Set the Execution Mode to Responder and Global Context — it will be injected into every actor's system prompt when the actor has Global flow context checked under Inherit. Also available to the routers.
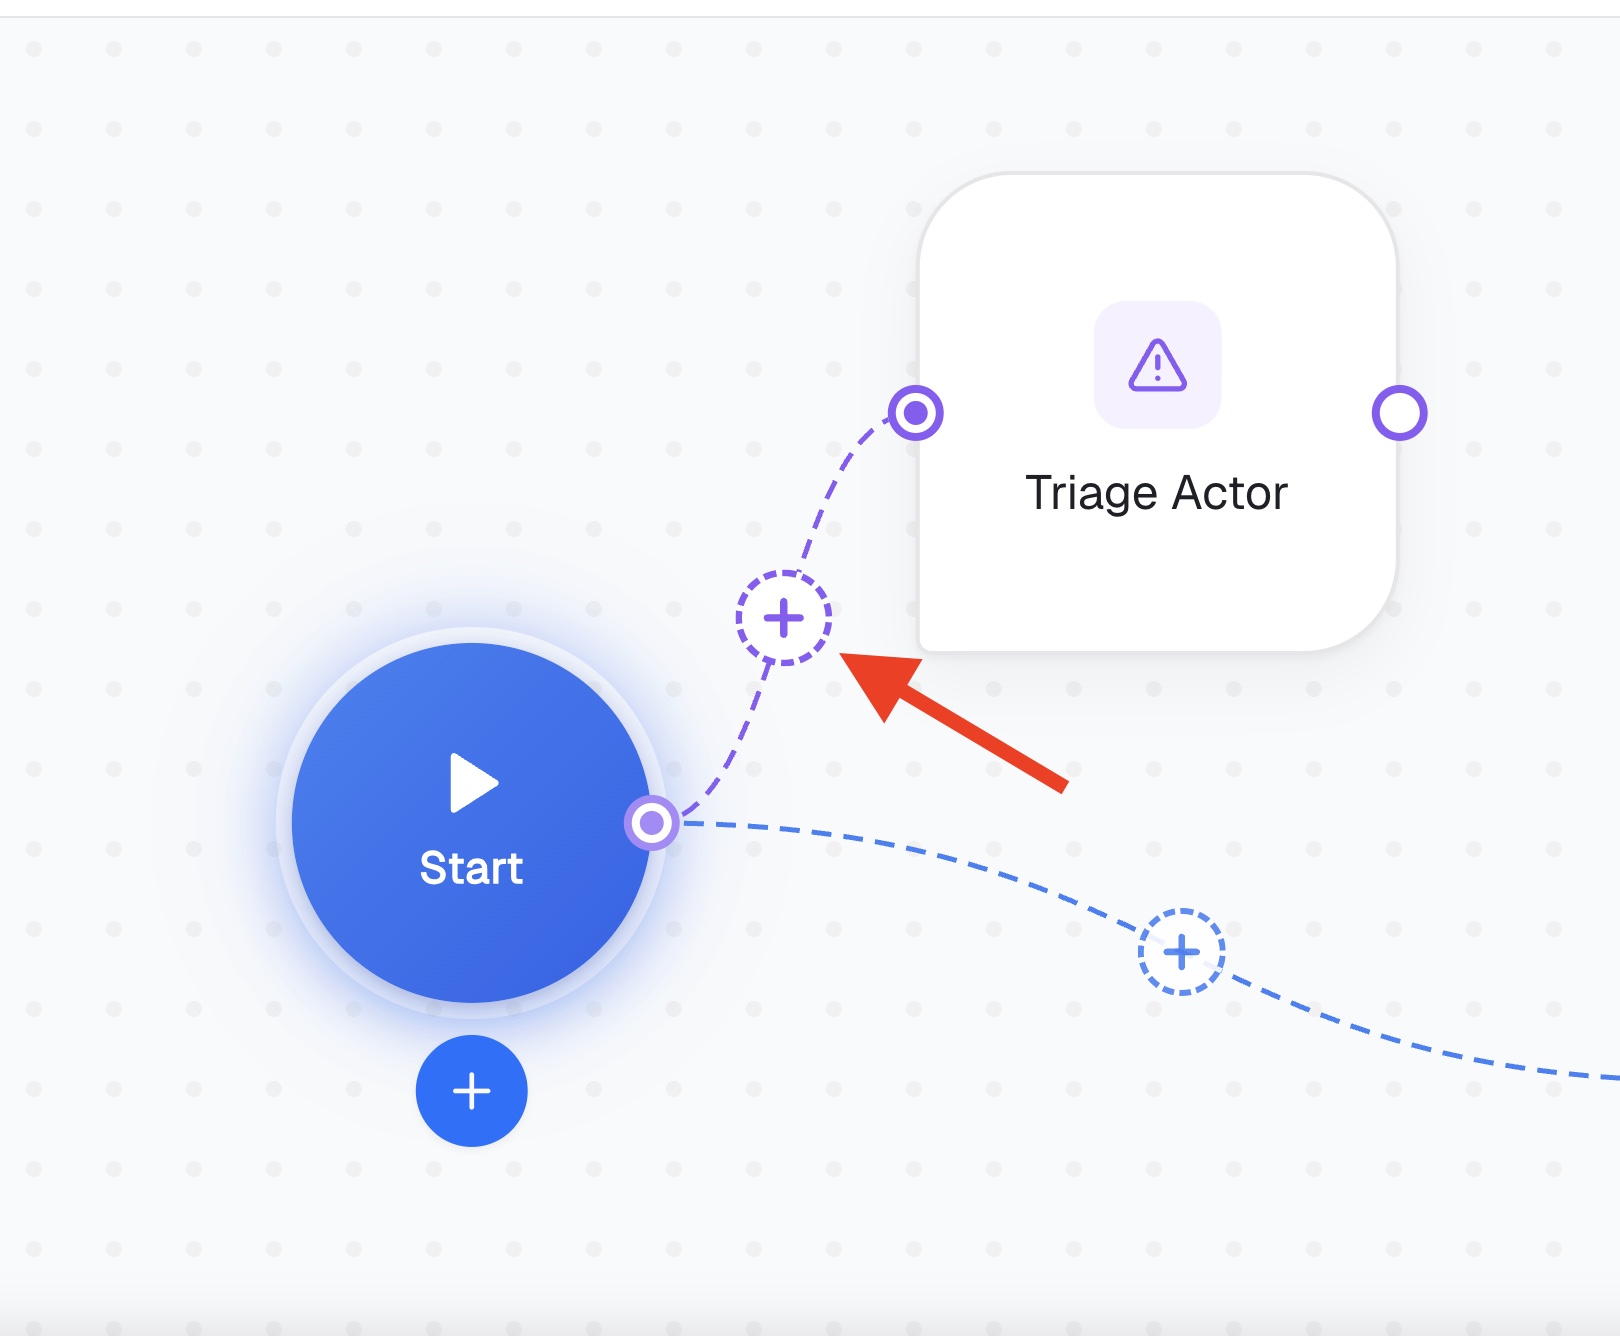
Click the "+" button and add the first Actor, name it. Click the connector between Start and the Triage Actor to open its Activation Condition panel — "When should this route be taken?" This is where you describe the user intent or situation that should trigger this path, e.g. "Any new inbound widget message" if Triage Actor is meant to catch everything by default. This is also where multi-branch routing actually happens architecturally: if you later add a second branch straight from Start into a Specialist Actor (bypassing triage for something like a simple FAQ), its Activation Condition is what keeps the two paths from colliding — e.g. "User asks a general pricing question with no account specifics."
Open the Triage Actor and go to the Basic tab. Context is general knowledge and background — domain knowledge, company info, tone of voice — and may be inherited by child actors. Put stable, company-wide information here: product names, business hours, escalation policy, tone.
Instructions are specific behavior and rules for this actor only, and are never inherited. This is where the triage logic itself lives: identify whether the request is billing, technical, sales, or general; identify urgency; do not attempt to resolve the issue, only determine where it belongs.
Each connection from the Triage Actor to a downstream Specialist Actor gets its own Activation Condition — this is the actual routing mechanism, not a separate condition node. For example:
Keep these descriptions specific and non-overlapping — vague conditions ("billing stuff") create ambiguous routing once real conversations hit edge cases.
On each Specialist Actor (Basic tab), check Inherit Context:
This pulls in whatever the Triage Actor already established — without it, a Specialist Actor starts cold with no memory of what was already gathered.
For the Triage Actor: "category and urgency have been identified." For each Specialist Actor: its actual resolution criteria — "all required billing details collected," "customer confirms issue resolved." This is what tells an actor when to stop and hand off cleanly instead of continuing to ask questions.
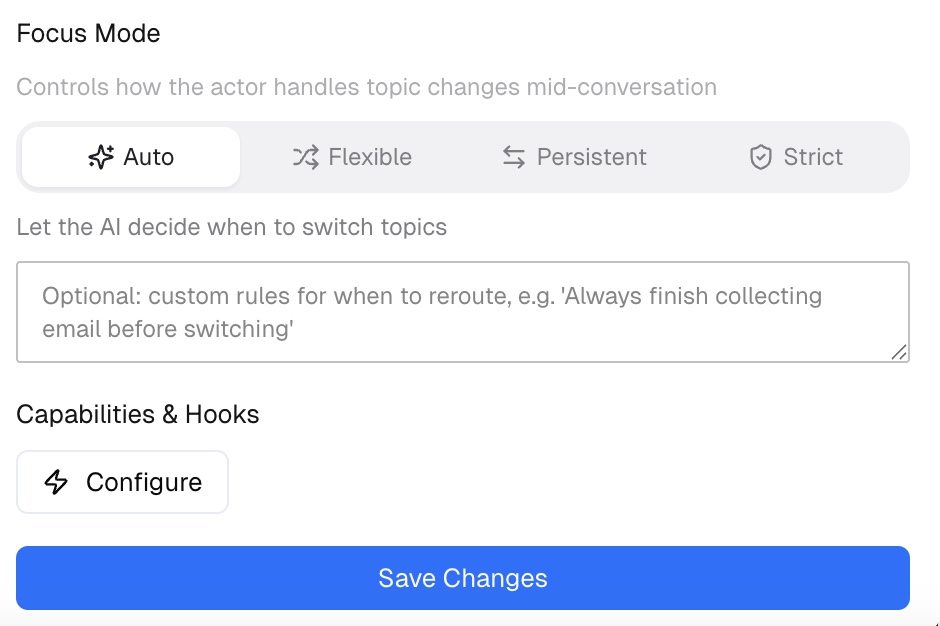
Focus Mode controls how the actor handles topic changes mid-conversation: Auto, Flexible, Persistent, Strict. For a Triage Actor, Strict or Persistent keeps it locked on classifying the request rather than getting pulled into resolving it. Specialist Actors can usually run Flexible, since some topic drift is normal once you're actually resolving something.
Don't leave Activation Conditions vague or blank — that's the field actually deciding which path a conversation takes, so an empty or generic condition means CogniAgent has no real basis for routing. Don't put routing logic in Context — it won't behave the way Instructions do. And don't forget Inherit Context on Specialist Actors, or every handoff starts from zero.
The same structure — a channel set once at the flow level, Activation Conditions deciding which actor handles a conversation, and Context/Instructions/Definition of Done/Focus Mode configuring each actor — is the general shape for any classify-then-route problem in CogniAgent: sales lead qualification, recruiting screening, internal IT requests. Swap the channel, the Activation Conditions, and what's in Instructions per actor; keep the parent-child structure intact.