How to Build a Candidate Screening Application in CogniAgent: From Job Application to Qualification Conversation
 Aug 17, 2026
 9 min read
 Aug 17, 20269 min read
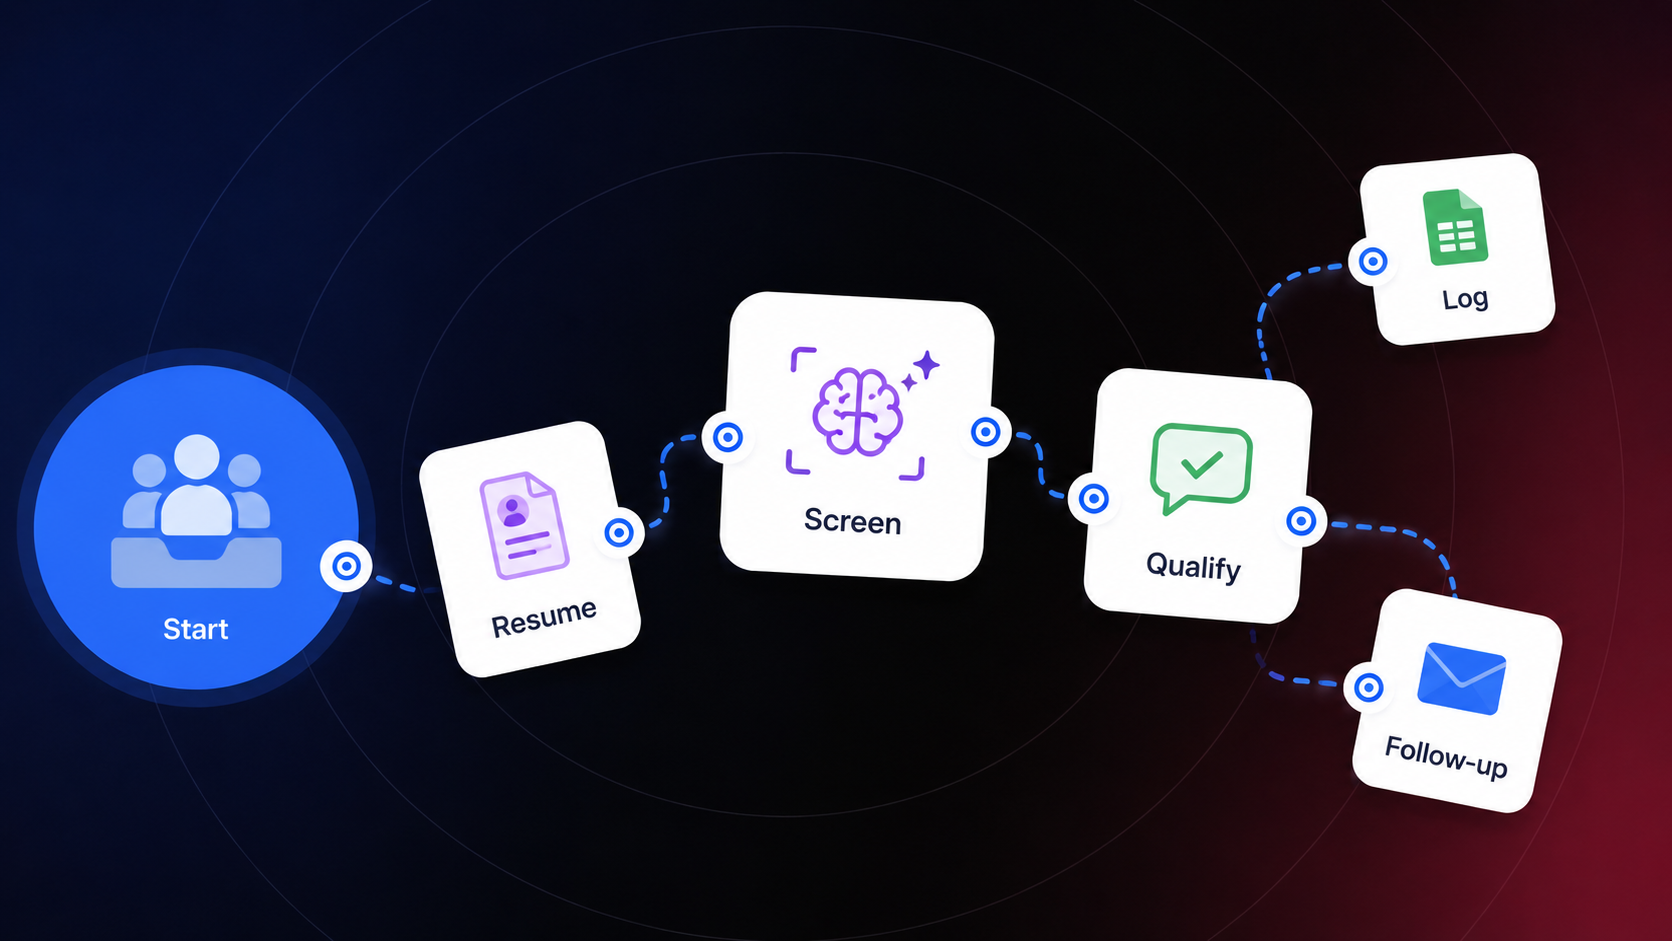
Most recruiting pipelines drown at the top of the funnel — every application looks urgent until someone actually sits down to read it, and by the time a recruiter opens the fortieth resume of the day, the qualified candidates have already taken another offer and the unqualified ones are still waiting on a reply that never comes. What actually needs to happen is a first-pass read the moment an application lands: check it against the minimum bar, log the ones that clear it, tell every applicant something either way, and hand the ones who pass into a deeper conversation before a human ever opens the file. That's an automated application screen, and in CogniAgent you can build it as a single Application: a Webhook trigger, an LLM node making the pass/fail call, a Condition node splitting the outcome, and — on the pass side — a chain of App Actions that ends by handing off into a Conversation Flow for the actual qualification interview.
In the builder canvas, this is a linear Application with one guard clause and one branch. A Webhook trigger receives the raw application, and before anything else runs, a quick duplicate check makes sure it isn't a repeat submission. From there, a Read File node pulls text out of any attached resume, and an LLM node scores the combined application against your minimum bar. That score feeds a Condition node, which fans into two paths: the met (pass) side runs three steps in sequence — reshape the data, log it, acknowledge it — then hands off to a Conversation Flow node that starts the actual qualification conversation. The unmet (fail) side is a single step: send a rejection acknowledgment. Nothing rejoins after either branch point — both ends are intentional, not something to reconnect.
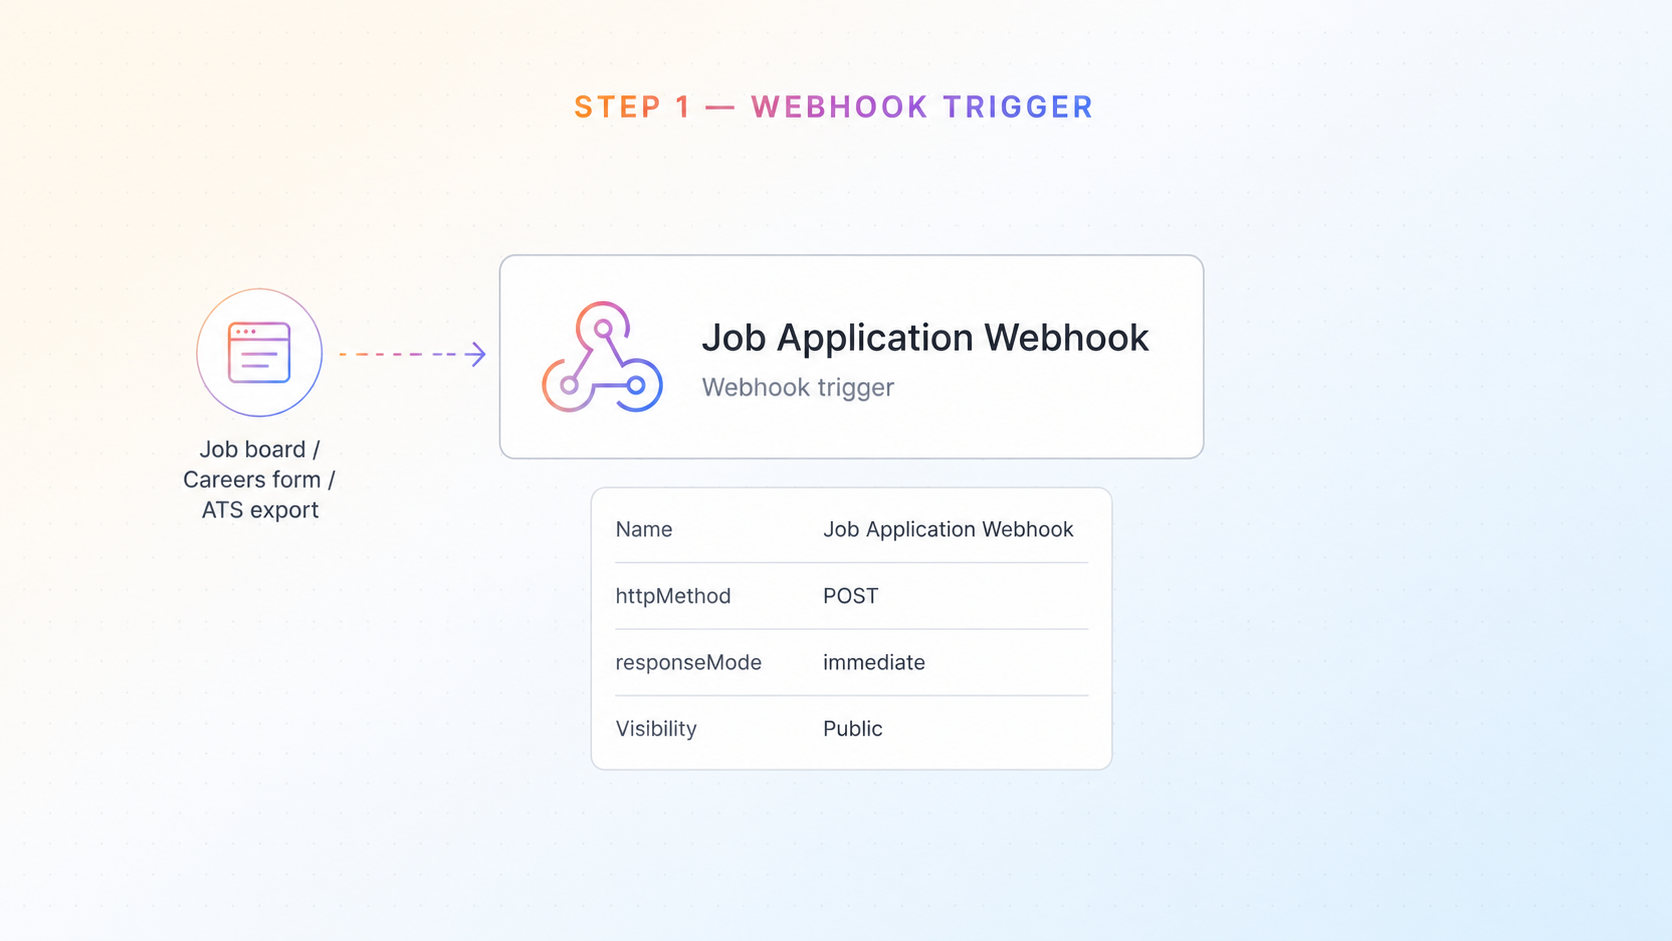
Add a Webhook trigger node and name it something specific to what's landing on it — "Job Application Webhook," not "Trigger 1." Point your job board, careers page form, or applicant-tracking export at the generated URL so every new application posts here in real time instead of sitting in an inbox.
Set httpMethod to POST — job boards and form builders post data, they don't GET it. Set responseMode to immediate rather than lastNode: this Application ends up handing off into a Conversation Flow several steps downstream, and lastNode would leave the submitting form waiting on that entire chain instead of getting a fast acknowledgment. Mark the webhook Public so the job board can actually reach it — and because a public webhook has no built-in auth beyond knowing the URL, if you want to keep spam submissions out, validate a shared secret from the request headers in a Condition node right after this trigger, before the Ask AI node spends money screening junk.
Step 2: Guard against duplicate applications
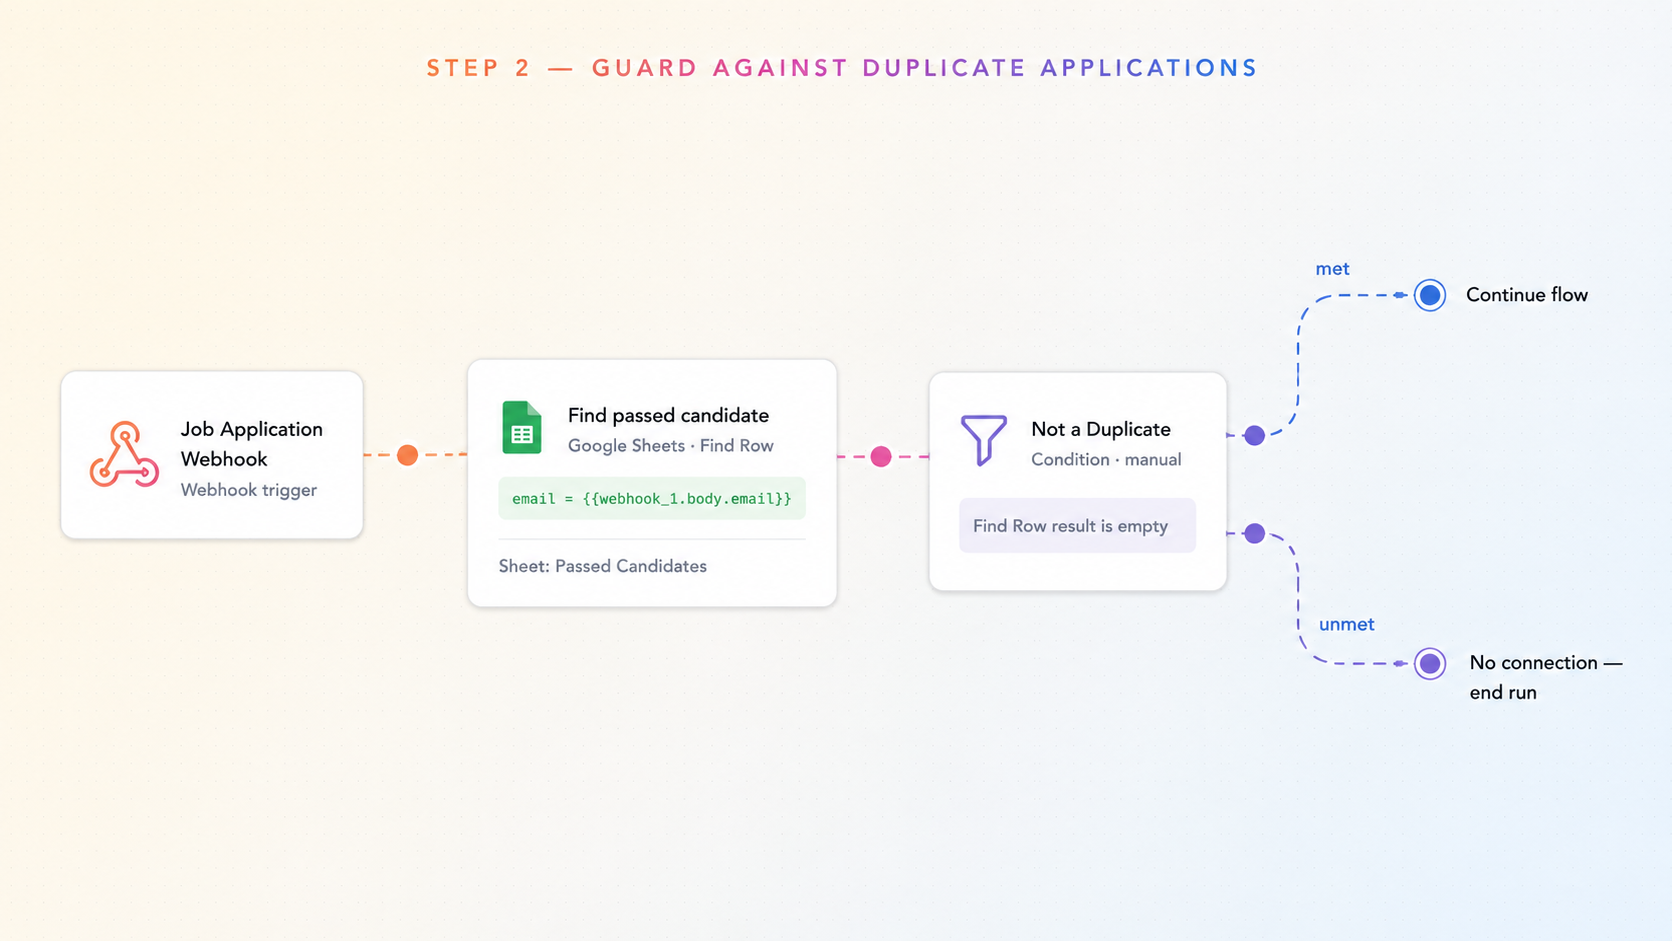
Add an App Action node with app set to Google Sheets and action set to Find Row. Search your "Passed Candidates" tracker for a row where the email column matches {{JobApplicationWebhook.body.email}}. Then add a Condition node named "Not a Duplicate," in manual mode, checking whether the Find Row result is empty.
The met handle means no match was found — a new applicant — so it continues into the rest of the flow. Leave the unmet handle unconnected. That's intentional here, unlike the screening Condition later on: a candidate who's already been logged and emailed doesn't need a second row or a second email, so ending the run quietly is the right call for a repeat submission.
Add a Read File node right after the duplicate check, with fileSource set to previous_node and fileReference pointing at the resume attachment on the webhook payload ({{JobApplicationWebhook.body.attachments}}). Set extractionMode to text. Most applications arrive with the actual resume as a PDF or Word attachment, not as plain text in a form field — without this step, the LLM node only ever sees whatever the application form asked for and never sees what's actually in the resume itself.
Add an LLM node and give it the actual screening judgment to make, not a vague summarization task. Set the system Prompt to something concrete:
"You are a recruiting application pre-screener. Read the candidate's application — resume text, cover letter, and answers to screening questions — and judge it only on job-relevant criteria: required certification or license, minimum years of relevant experience, and location within the service area. Ignore anything not relevant to those criteria. Respond only in JSON: {"score": 0-100, "passes": true or false, "reason": "one sentence explaining the decision"}."
Reference the resume text from the previous node and the webhook's payload in the userMessage field ({{parse_file.content}} plus {{JobApplicationWebhook.body.}}) so the node is reading the actual application, not a static example. Pick a model that fits your volume and budget; a smaller, cheaper model like GPT-4.1 Mini is usually enough for a structured scoring task like this one.
Add a Condition node named "Candidate Passes Screening" right after the LLM node. Use expression mode rather than ai mode here — you already have a clean number sitting in the LLM node's structured JSON output, so there's no reason to pay AI-judgment latency to re-decide something already decided. Write the condition as {{llm.response.score}} >= 70, and adjust the threshold to match how strict you want the bar to be. A score is worth the small amount of extra setup over a plain boolean because it gives you one dial to tune later — raise or lower the cutoff as you see how the pipeline performs — without touching the screening prompt itself.
The met (green) handle is where a passing candidate continues into logging, acknowledgment, and the qualification conversation. The unmet (red) handle is where a candidate who doesn't clear the bar gets routed to a rejection — connect it. An unconnected unmet branch doesn't error, it just quietly ends the run there, which means every rejected candidate gets total silence instead of a reply.
Off the met handle, add an Execute Code node named "Prepare Candidate Sheet Row." The node can write in python — write code that flattens the webhook payload and the LLM verdict into one flat object your tracking sheet can actually use as a row:
python
from datetime import datetime

return {
  "name": input["webhook_1"]["body"]["name"],
  "email": input["webhook_1"]["body"]["email"],
  "role": input["webhook_1"]["body"]["role"],
  "score": input["llm_1"]["response"]["score"],
  "screeningReason": input["llm_1"]["response"]["reason"],
  "appliedAt": datetime.now().isoformat()
}
This step exists because the App Action node two steps downstream maps its parameters to spreadsheet columns by field name — feeding it the raw, nested webhook body plus a separate LLM response object instead of one flat object means columns end up misaligned or blank instead of matching what you actually want logged.
Add an App Action node with app set to Google Sheets and action set to Append Row. Point connection at your candidate-tracking spreadsheet, target the "Passed Candidates" tab, and map each column to the matching field on the previous node's output — {{execute_code.result.name}}, {{execute_code.result.email}}, and so on. This gives you a running, human-readable log of everyone who cleared the automated screen, without a recruiter having to reconstruct it from your email history later.
Add a second App Action node with app set to Gmail and action set to Send Email. Set the recipient to {{JobApplicationWebhook.body.email}} and write a short acknowledgment confirming the application was received and that the candidate is moving forward — reference the role by name ({{JobApplicationWebhook.body.role}}) rather than sending something generic enough to apply to any job. A candidate who applied on Monday and hears nothing until a human gets around to it on Thursday has usually already applied somewhere else by then; this step is what closes that gap immediately.
Add a Conversation Flow node as the last step on the pass path and point it at a dedicated Conversation Flow built to run the deeper, multi-turn qualification interview — availability, specific experience details, follow-up questions a one-shot screening prompt can't cover well. Pass the candidate's name, role, and screening reason into the flow's starting context when you start it, using the same fields you already logged in Step 6. Without that, the qualification actor starts the conversation cold and asks the candidate to repeat information they already gave you on the application — which reads as the system not having read their application at all.
Off the unmet handle from Step 5, add an App Action node with app set to Gmail and action set to Send Email. Keep the message honest but not clinical — thank the candidate, tell them plainly the role isn't a fit right now, and avoid implying a callback that isn't coming. This is the only step on the fail path; there's no logging or hand-off needed for applications that don't clear the bar.
Don't want to build this from scratch? CogniAgent's template library has ready-made Screening and recruiting flows you can install directly into your workspace — browse them at templates.cogniagent.ai and click to install.