Part 2: The Notification Application
Part 1 built the conversation. A caller answers a handful of questions, the Lead Qualification actor logs the result into Google Sheets, and the flow ends there. Nobody has heard back yet. This part builds the Application that picks up that logged row, checks the contact email is usable, and sends the customer a confirmation. It also lets sales know a new lead came in.
The architecture at a glance
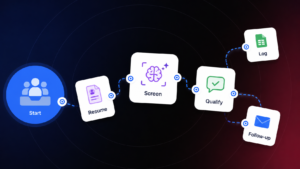
Four nodes, no branch. A Google Sheets trigger fires when the Lead Qualification actor appends a row. A code node reshapes that raw trigger payload into named fields and checks the email address before anything gets sent. Two Gmail nodes follow in sequence: one to the customer, one to sales. Nothing here waits on a reply or checks a calendar. It runs once per new row and finishes.
Step 1: Add the Google Sheets trigger
Open Applications and create a new Application triggered by an Event from an App node connected to Google Sheets. Set the event to fire on new row added, watching the same sheet and tab the Lead Qualification actor logs into (the Leads tab from Part 1). This is what connects the two builds: the actor’s Google Sheets integration writes the row, and this trigger notices it.
Name the trigger node Conversational CRM. Its output carries the full row: requested service, residential or commercial (if applicable), service location, approximate size or scope, frequency, preferred date and time, special requirements, customer name, customer email address, and follow-up permission.
Step 2: Add the Prepare Lead Email code node
Add an Execute Code node named Prepare Lead Email, right after the trigger. Set its input to payload = app_trigger_1, so it receives the raw row exactly as the trigger produced it.
Use this node for two things: pulling the row’s columns into named variables the Gmail nodes can reference, and validating the email address before either Gmail node runs. A short regex check against contact_email covers most malformed addresses: a missing @ symbol, no domain, stray whitespace pasted in from the call transcript.
If the address fails validation, stop the chain here rather than letting a bad address reach the Gmail nodes. Write an invalid_email status back to the row in Google Sheets so sales can spot it and follow up manually, and skip both email sends for that run. A confirmation email that bounces looks worse to the customer than no email at all, and a failure on the sales-notification side means a real lead never reaches anyone.
Step 3: Send Customer Confirmation
Add a Gmail node named Send Customer Confirmation. Set To to the validated contact_email field from the previous step, not the raw trigger output. Build the subject and body from the same node’s output: the customer’s name, the service they asked about, and their preferred date and time.
Keep the message factual rather than promising anything the qualification actor didn’t confirm. A line like “Thanks for reaching out. Someone from our team will follow up about your {{requested_service}} request for {{preferred_date}}.” holds up regardless of what the sales team decides once they see the lead. Don’t state a price, a specific arrival time, or an acceptance the actor never established.
Step 4: Notify Sales
Add a second Gmail node named Notify Sales. Point To at a specific sales-manager address, not a placeholder or a distribution list nobody’s confirmed exists. The subject and body should carry the full lead: customer name, contact email, requested service, location, size or scope, frequency, timeline, and any special requirements, plus a note if the lead came in through a shared test number so a rep isn’t confused by an unfamiliar caller ID.
Keep this node after Send Customer Confirmation in the sequence rather than parallel to it. If the customer email fails for some reason unrelated to validation (a Gmail quota limit, for instance), you still want sales notified. Running them in sequence, with each on its own retry, keeps one failure from taking out the other.
Step 5: Test the full chain
Run a lead through Part 1’s phone flow to completion, then confirm: the row appears in Google Sheets, the Application trigger fires on that row, Prepare Lead Email produces the expected fields, the customer receives a confirmation email, and sales receives the notification with the full lead detail.
Then test the failure paths individually: a row with a malformed email (confirm both Gmail nodes get skipped and the row gets flagged), a row with no email at all, two rows logged back to back (confirm the trigger fires once per row, not once for both), and a deliberate Gmail send failure (confirm the other Gmail node still runs rather than the whole chain stopping).
Why this pattern matters beyond lead notifications
Trigger on a logged record, validate the one field that would break everything downstream, then fan out to the people who need to know is the same shape behind an order-confirmation email paired with a warehouse alert, or a support-ticket acknowledgment paired with an on-call page. Swap what’s being validated and who the two notifications go to. Keep the validation step ahead of both sends, and keep the sends independent of each other, so one failure doesn’t take out the notification that matters most.
Other guides in this series cover the steps that follow.