How to Create an Inbound Triage and Customer Communication Agent on CogniAgent
Use case: Urgency triage + routing
Segment: Any service business handling inbound requests
Difficulty: Intermediate
Time to build: 30–45 minutes
The problem this workflow solves
Approval delays stall work that’s ready to start. Urgent and routine requests land in the same queue – wrong priority, wasted response time. Without a triage layer at intake, every routing decision falls on whoever picks up the message first.
The intake problem isn’t volume – it’s classification. Every inbound message carries urgency information, but nothing reads it until a person does.
This workflow fixes that. Every message across chosen channels gets read by an AI that extracts job type, urgency indicators, situation status, and approval state before routing it to the right response path. Emergencies escalate immediately. Same-day requests get available slots. Standard requests get a booking window. All of it logs to your CRM automatically.
Step-by-step build
Step 1 – Create the workflow
Open CogniAgent and create a new workflow. Name it something descriptive for your business, like [Your Service] – Inbound Triage. This keeps it distinct from other workflows you may have running for follow-ups, reviews, or reminders.
Step 2 – Add Channel Dispatcher nodes
Add Channel Dispatcher nodes for each inbound channel your business actually uses:
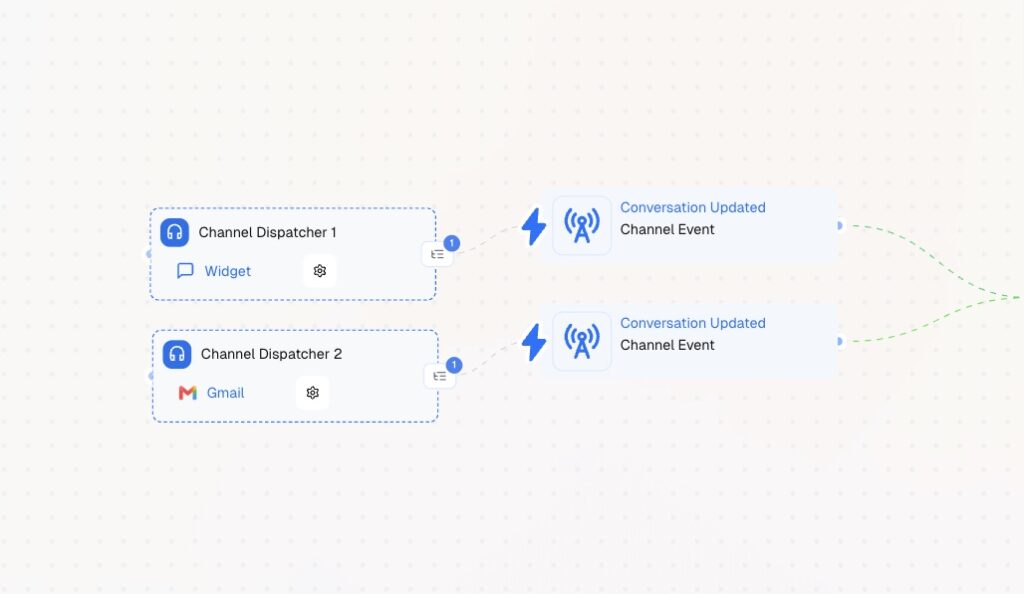
Each Channel Dispatcher triggers on a conversation_updated event. All connect forward to the same Communication Actor – this is what keeps messages unified regardless of which channel a customer used.
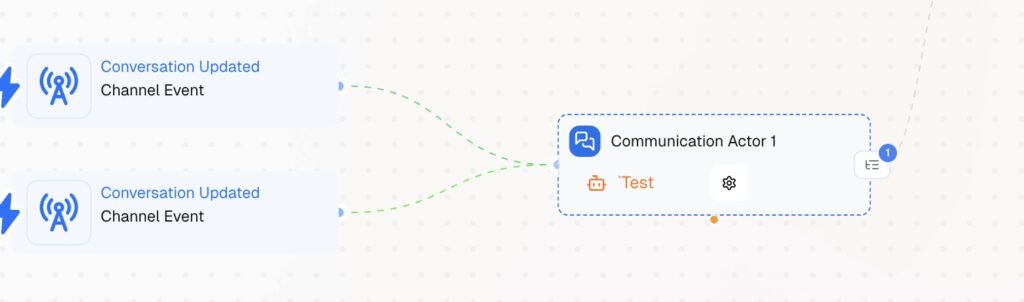
Step 3 – Add the Communication Actor and configure form fields
Add a Communication Actor node and connect all Channel Dispatchers to it.
Open the node settings and configure:
Under Form Fields, add the fields your routing logic needs. For any service business, configure at minimum:
These four fields are what the Multi-Condition router reads to assign a path. Keep labels simple – the Skillset Engine translates them into natural conversational prompts automatically.
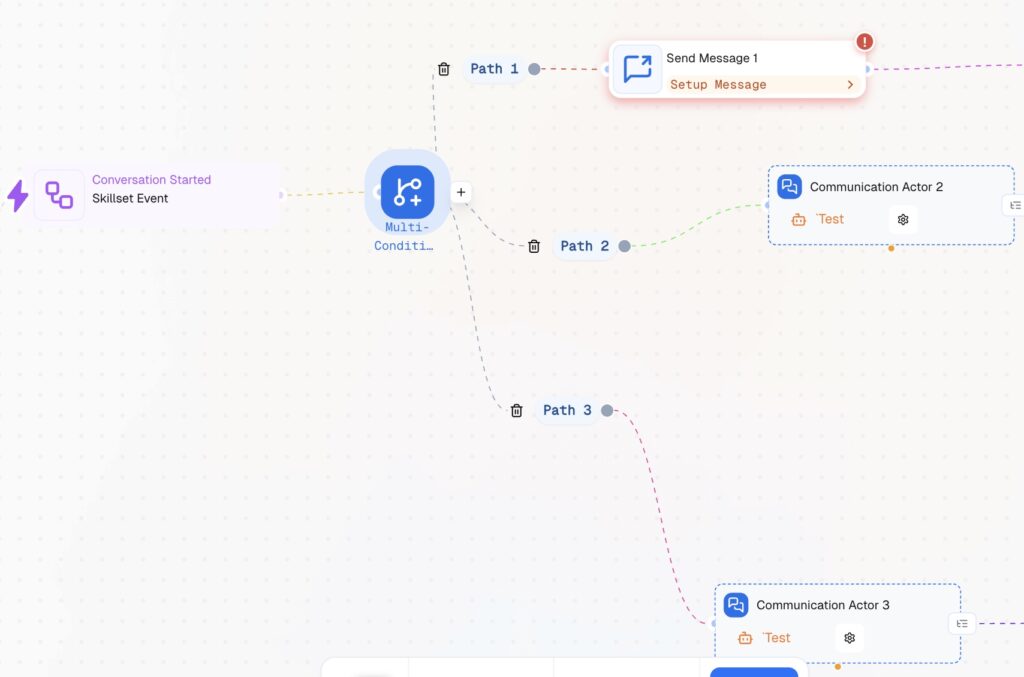
Step 4 – Add the Multi-Condition router
Add a Multi-Condition node connected to the Communication Actor output. Configure three paths:
Path 1 – Status update / follow-up Condition: customer is following up on an existing request or has approved something and wants to know what happens next. What happens: Send Message node with the current status or next steps, then an Integration Action alerts the relevant team member. No new booking flow – the job is already assigned.
Path 2 – Same-day Condition: customer needs service today. Urgency present but not a full emergency; same-day availability expected. What happens: Communication Actor collects any remaining details, then Send Message offers two available slots for today.
Path 3 – Scheduled Condition: customer is planning ahead. No urgency, flexible timing. What happens: Communication Actor handles the conversation, then Send Message offers three slots across the next 48–72 hours.
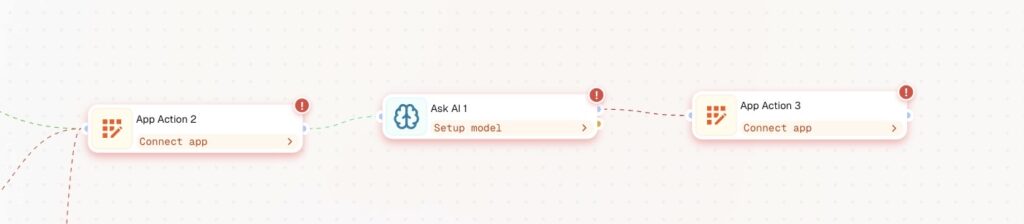
Step 5 – Add CRM logging and the summary step
After all three paths reach a confirmed or alerted state, connect them to the post-conversation logging sequence:
What this changes operationally
Before this workflow, urgency was invisible at intake. Staff read messages when they had a free moment, emergencies waited in the same queue as routine requests, and managers found out what came in by asking.
After this workflow, every inbound message is classified within seconds of arrival. Urgent requests surface immediately. Routine bookings fill your schedule without manual intervention. The CRM logs every interaction automatically. And your team gets a summary without asking for one.
Follow other guides to learn what you can build with CogniAgent.