Feb 09, 2026

3 min read
The Problem with Manual Form Handling
You receive inquiries through your website form every day. Some visitors want to book a demo or talk to sales. Others need support. Some reach out about partnerships or requests that don’t fit either category.
Without web form automation, someone has to read each submission, figure out where it belongs, and forward it manually. That delay costs you leads.
The Solution: Web Form Filling Automation with CogniAgent
CogniAgent turns your website form into an intelligent routing system.
The moment a submission comes in, the workflow reads it, classifies the intent, and sends an alert to the right team — via email, Slack, or any other channel — instantly. No manual checking. No missed inquiries.
This is web form automation at its simplest: one webhook, a few condition nodes, and every inquiry lands exactly where it should.
Let’s build it.
Step 1 — Create the Webhook Node
Add a Webhook Event node. This is your entry point — it generates a unique URL that you connect to your website form.
Once configured, every form submission triggers the workflow automatically. The node captures all request data: headers, body, and query parameters — everything your conditions will need to classify the inquiry.
Setup steps:
- Copy the webhook URL from the node
- Add it to your website form or external service
- Configure your service to send POST requests to this URL
- Deploy — the URL is unique per execution

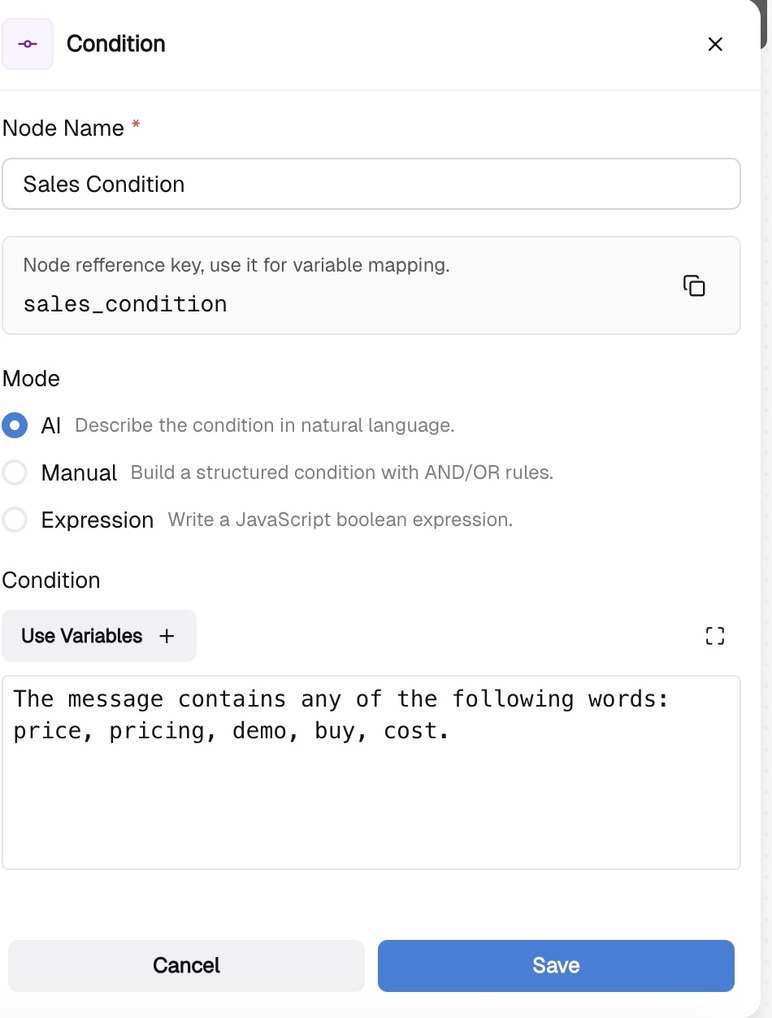
Step 2 — Set the Sales Condition Node
Add a Condition node and describe your sales routing logic in plain language. For example: “Route this if the inquiry is sales-related.”
The AI interprets the condition and applies it automatically — no code required. This is what makes CogniAgent a practical web form automation tool: you define the logic in natural language, not expressions.
Step 3 — Route the True Branch to Sales
Connect the True branch to your sales notification channel — email, Slack, or a direct message to the sales team.
When a visitor submits a sales-related inquiry, your team gets notified immediately and can respond while the lead is still warm.
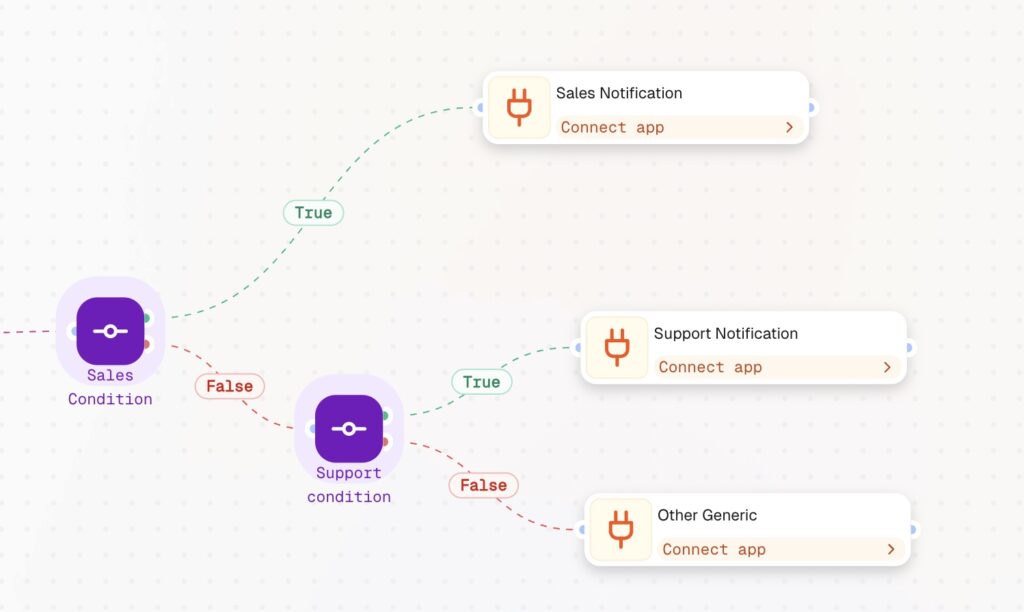
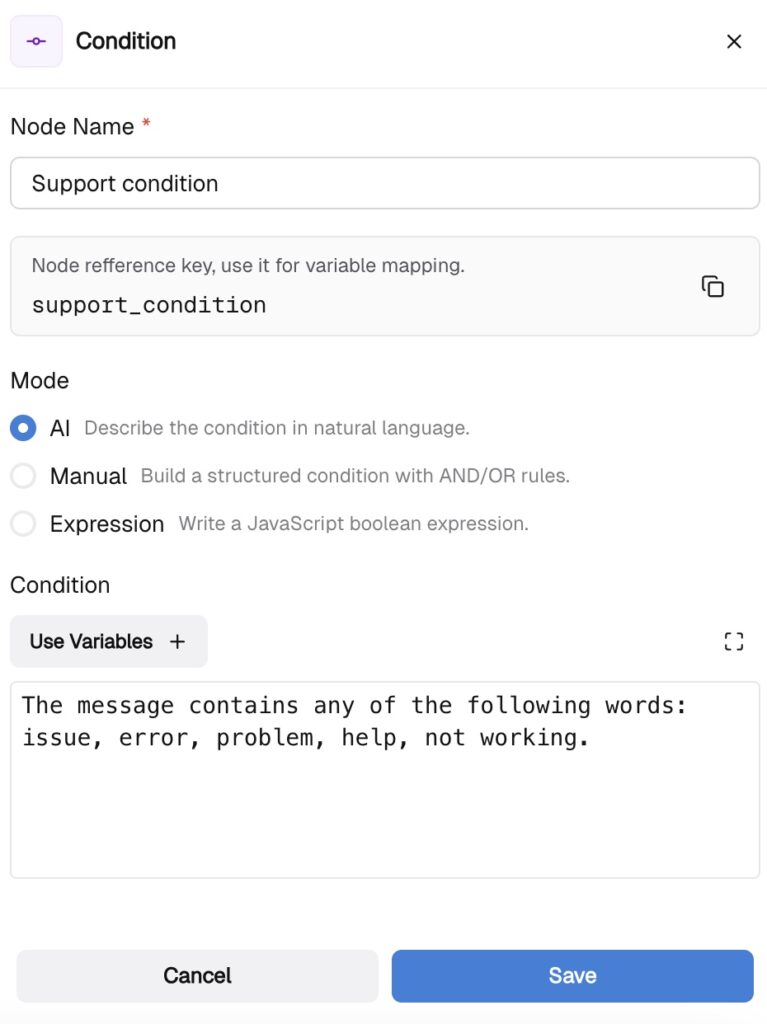
Step 4 — Add the Support Condition on the False Branch
Not every submission is sales-related. Connect a second Condition node to the False branch and name it “Support Condition.”
Describe the support routing logic the same way — plain language, no code. Your workflow now handles two paths: sales inquiries go to sales, support inquiries go to support.
Step 5 — Route Everything Else to General Inquiries
Some submissions don’t fit either category — partnerships, press, or other requests you still don’t want to lose.
Connect the second False branch to a general destination: a shared inbox, a dedicated Slack channel, or any other endpoint. Nothing falls through the cracks.
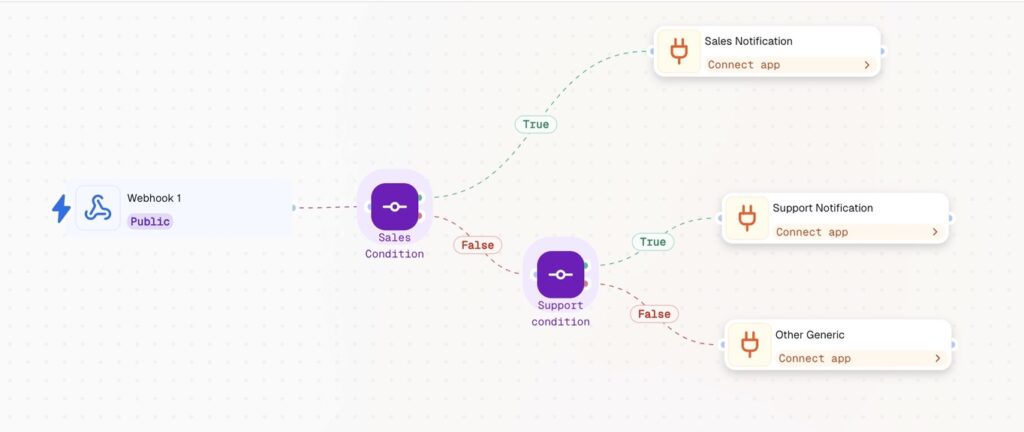
The Result: No Inquiry Goes Unanswered
Your web form automation workflow now handles three routing paths automatically:
- Sales inquiries → sales team, instantly
- Support inquiries → support team, instantly
- Everything else → general inbox, instantly
No manual checking. No delays. No lost leads. One webhook, a few condition nodes, and your entire form intake runs on autopilot.
Explore more step-by-step guides and start automating your workflows from day one — in minutes, not hours.