How to Automate Task Management from Meeting Notes in CogniAgent
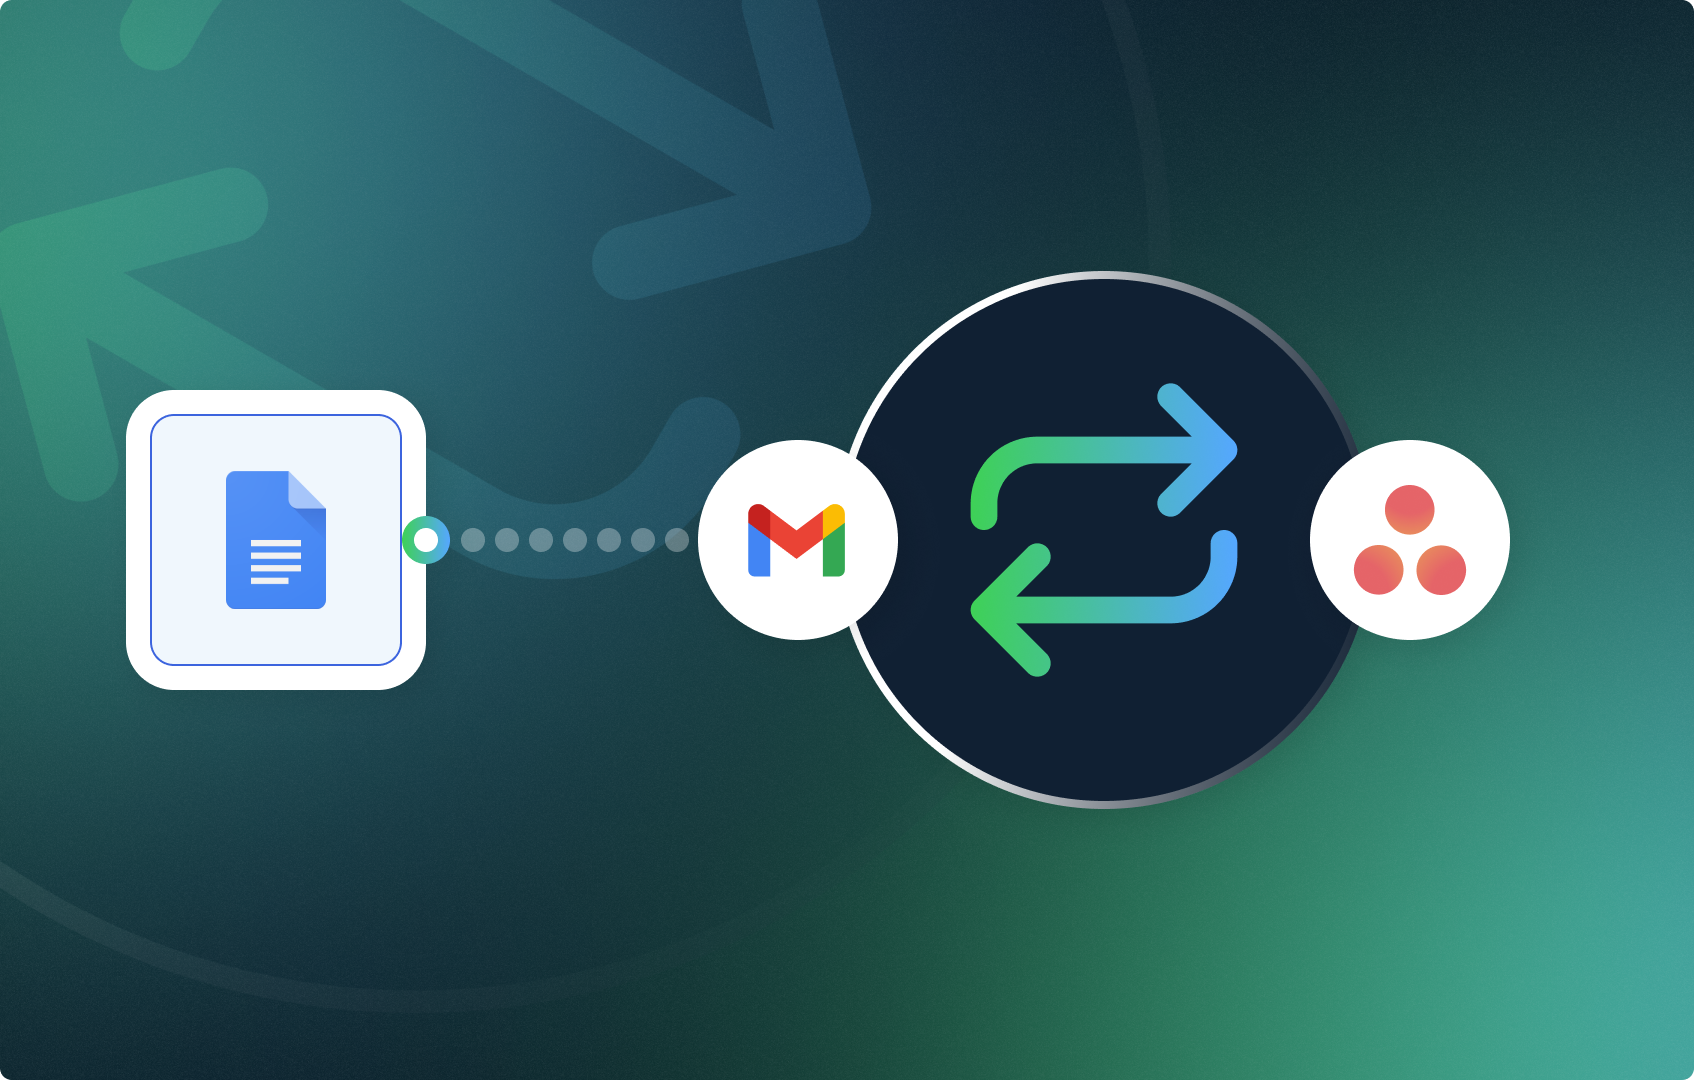
You probably have daily meetings that are recorded, after which you manually enter the resulting tasks into your project management tool. Why do that manually when you can automate the entire process with CogniAgent — from the moment you receive meeting notes to the moment tasks appear in your workflow?
Follow this step-by-step guide to set it up in less than five minutes.

By the end of this guide, you’ll have an AI-powered workflow that:
You have two options for how to start the workflow.
Option 1: Use the Start Button trigger to manually run the workflow on demand. This is the simpler approach and the one we’ll use in this guide.
Option 2: Use the Event from App trigger to start the workflow automatically when Gmail receives a new email with an attachment (e.g., your meeting notes). To configure this, open the Gmail node and filter by: action = new email with attachment, inbox = unread, and optionally filter by sender name — for example, if your meeting notes arrive from Gemini.
For now, select the Start trigger from the nodes panel to proceed.
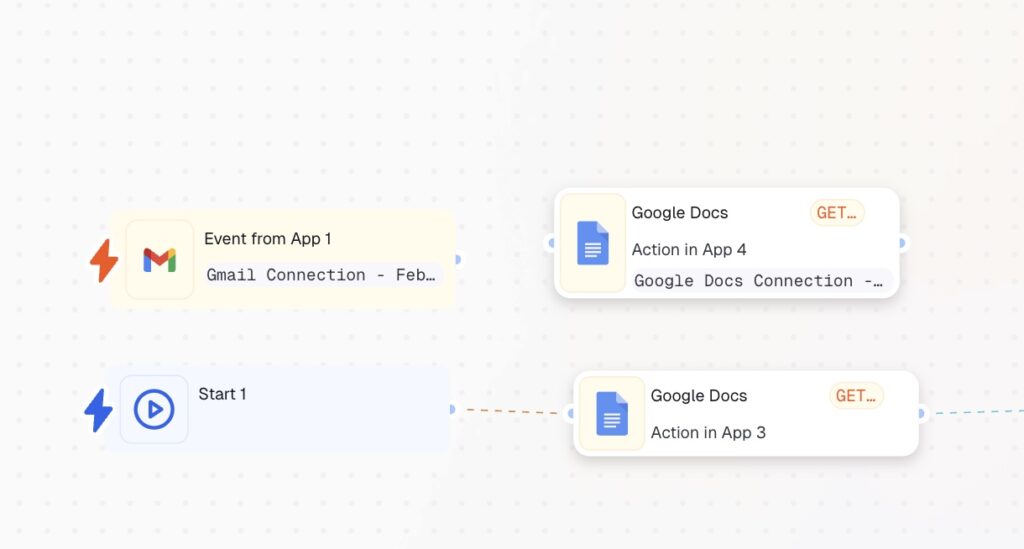
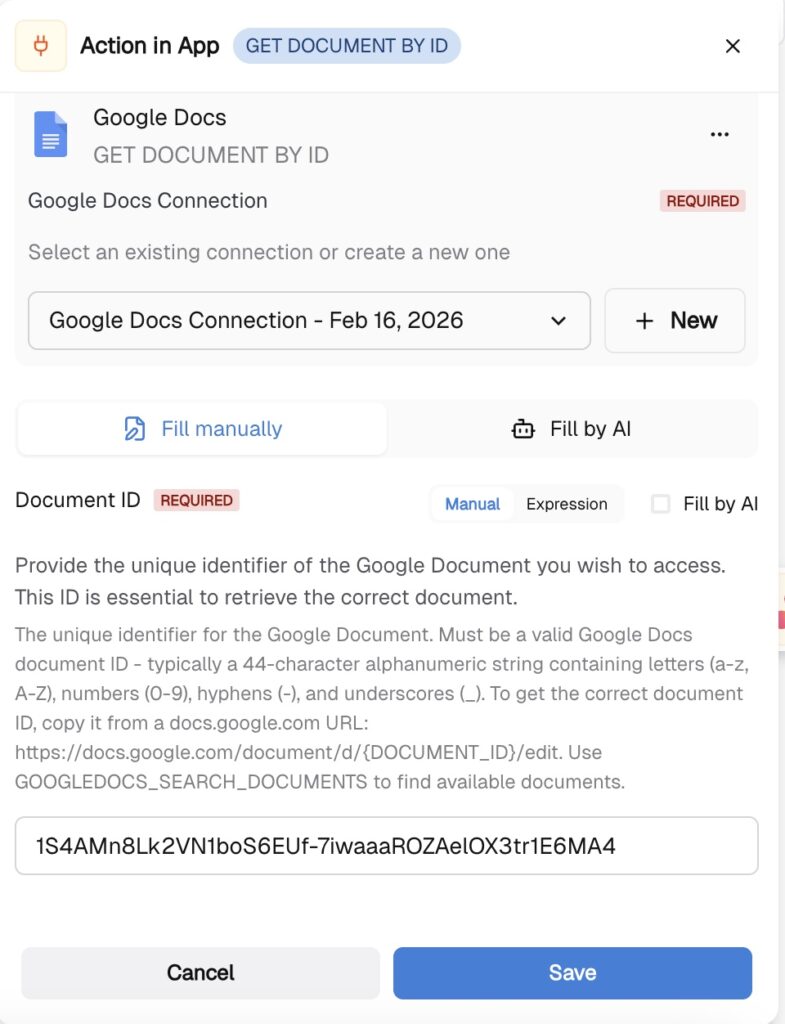
Select Action in App node and choose Google Docs. Then select the action Get Document by ID.
Connect the node to the Google account where your meeting notes are stored, and provide the Document ID by following the instructions in the node settings.
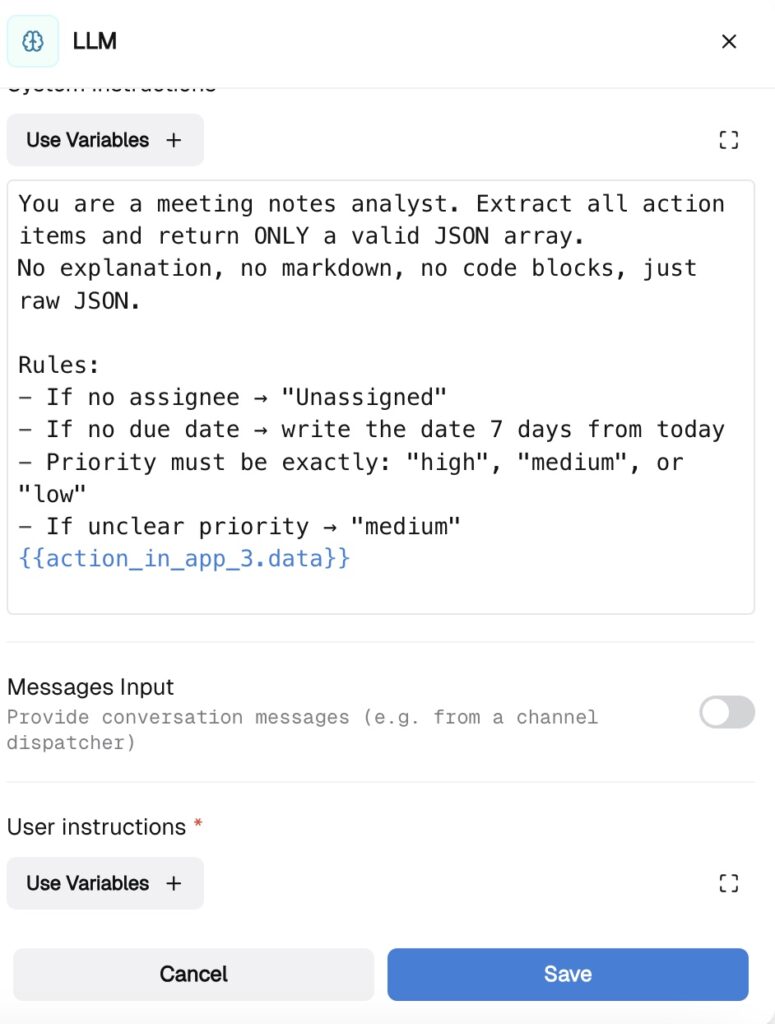
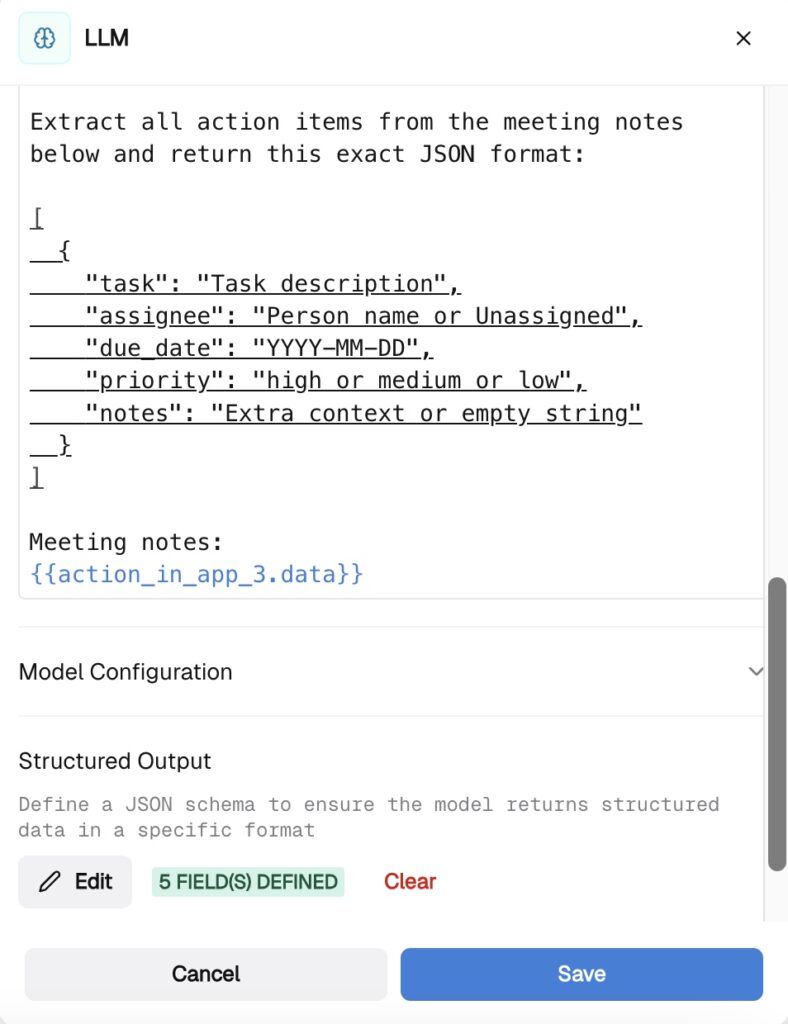
Add an LLM node and connect it to the previous node. Open it and configure the following:
Model: Choose a model suited for contextual reasoning. GPT-5.2 is a good choice for this scenario.
System instructions: Define the role of the LLM. For this workflow, set it as a meeting notes analyst. Use the variable selector to point the node to the document content from the previous step.
User instructions: Specify exactly what you want the model to extract — for example, the task name, deadline, assignee, and any additional notes. Be as detailed as possible to get accurate results.
Structured output: Scroll down to the Structured Output section and define the fields you need — such as task, assignee, and priority. Customize this to match your specific requirements.
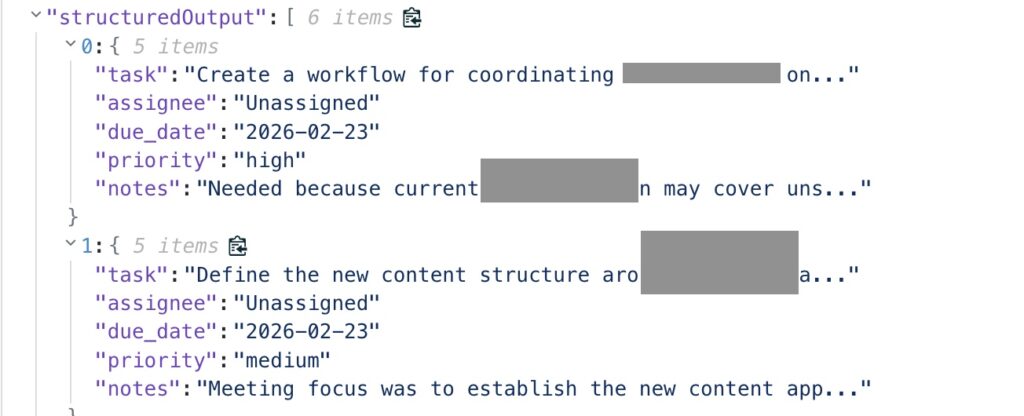
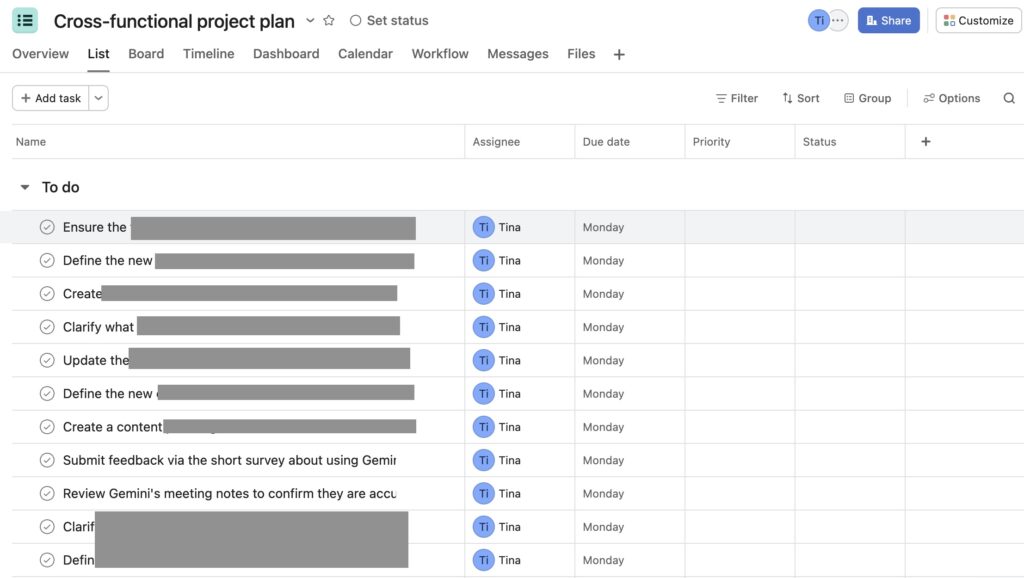
This is the result you will achieve:
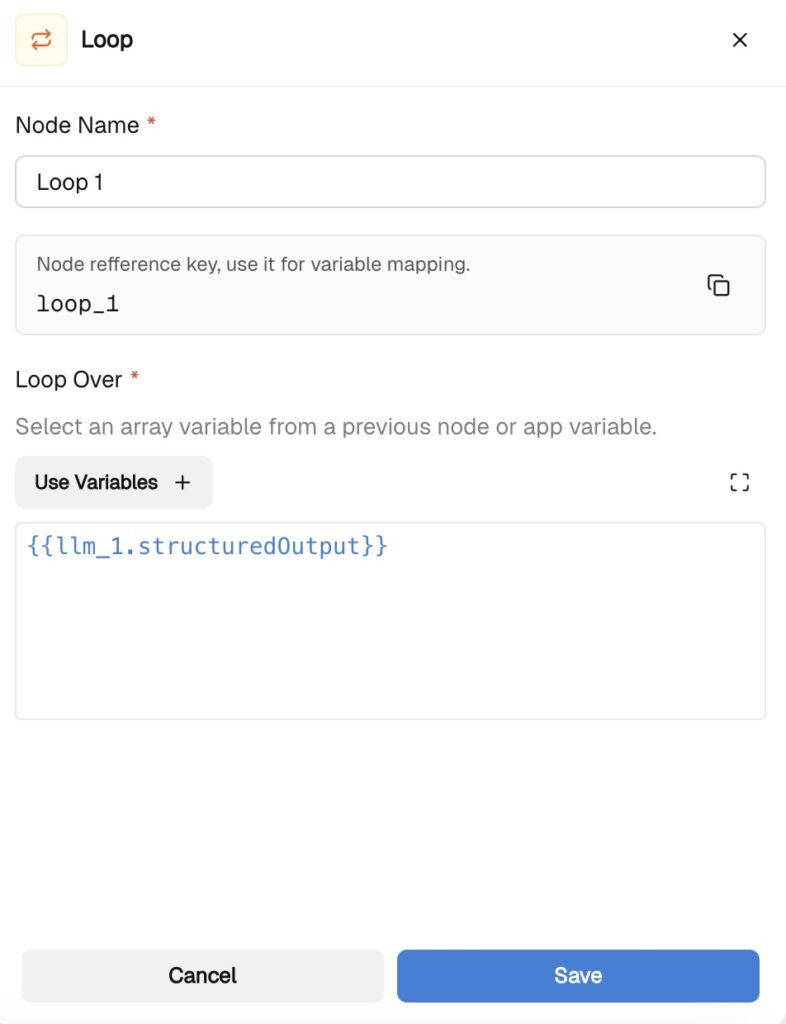
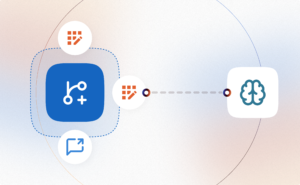
Add a Loop node and connect it to the LLM node. Open the Loop node and map it to the structured output from the previous step using the variable selector. The Loop node will iterate over each extracted item and process it individually.
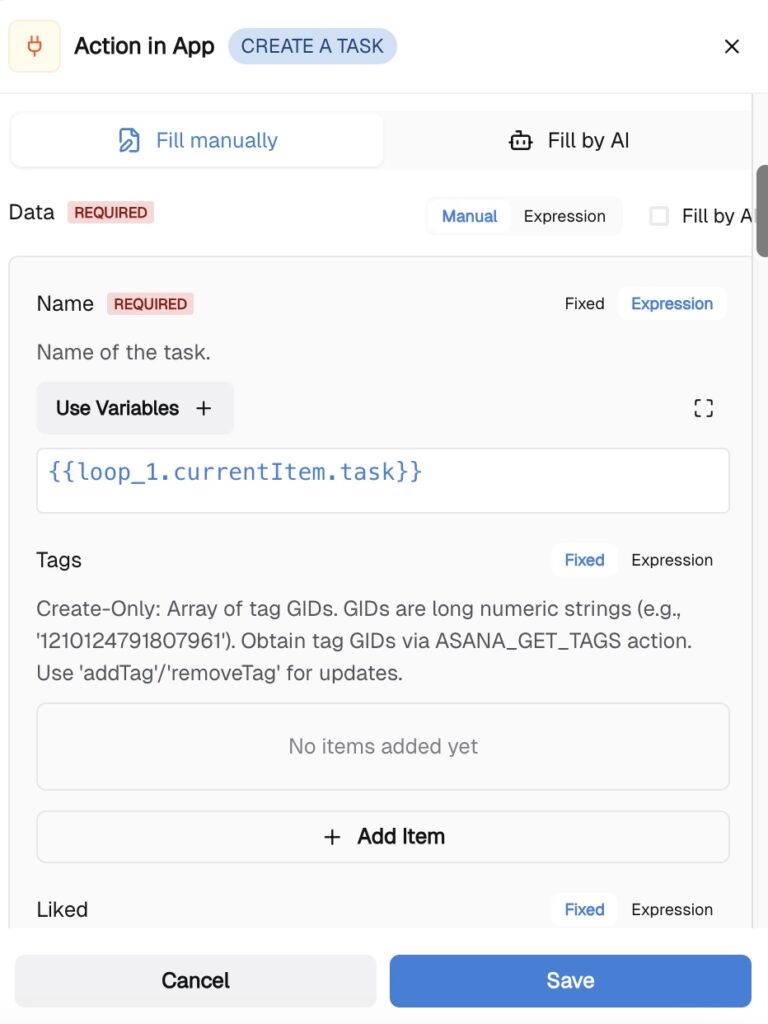
Add an Action in App node and select your task management tool. This guide uses Asana, but CogniAgent also integrates with ClickUp, Jira, Notion, and other platforms.
Select Asana and choose the Create a Task action. Connect the node to your Asana account, then map the fields:
Fill in all remaining fields by following the in-node instructions and mapping data from the Loop node as described above. Once complete, click Save, then hit Start.
Your tasks are now automatically extracted from meeting notes and created in Asana. From here, you can enrich the workflow further — for example, by setting task priorities automatically or sending notifications to teammates in Slack. All of it, automated.
Check other guides and automate your daily tasks today!
 Jun 04, 2026
 4 min read
 Jun 02, 2026
6 min read
Jun 02, 2026
6 min read
 May 14, 2026
6 min read
May 14, 2026
6 min read