How to Build an Abandoned Cart Recovery Workflow (E-Commerce Example: Part1)
Every e-commerce store loses revenue to abandoned carts. More than 70% of online shoppers add items to their cart and leave without completing a purchase. The good news is that a large portion of those customers can be recovered – they just need the right nudge at the right time.
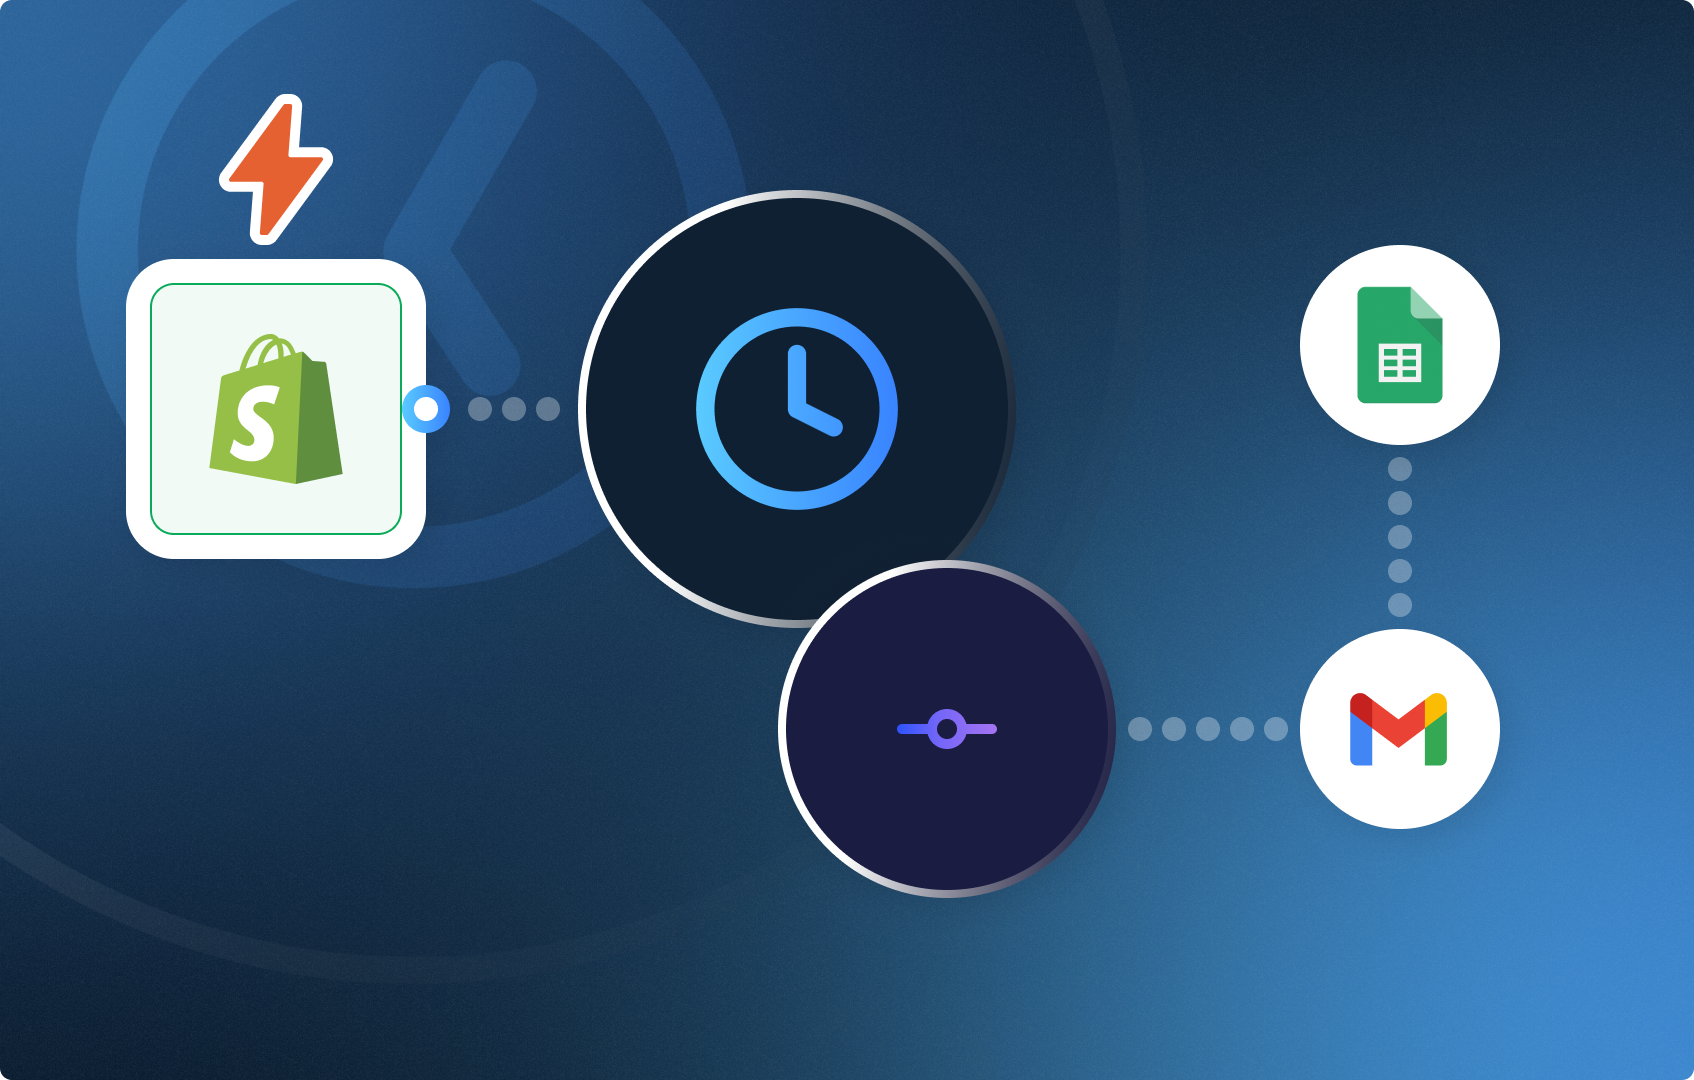
Follow this step-by-step guide to learn how to build a fully automated abandoned cart recovery workflow in CogniAgent. Once set up, it will detect abandoned carts from your Shopify store, generate personalized recovery emails using AI, and run up to three follow-up attempts with different offers to encourage customers to complete their purchase – all without any manual work on your end.

By the end of this guide, you’ll have an AI-powered workflow that:
This Guide is divided in 2 parts. Let’s build the first part!
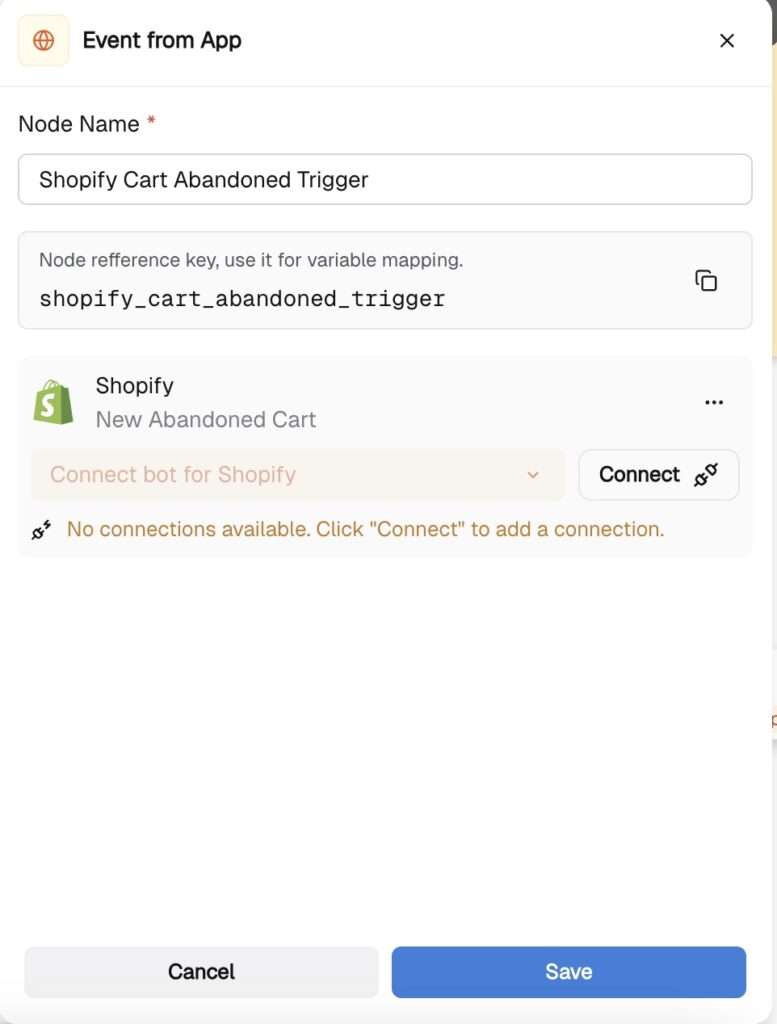
To build the workflow, make sure your Shopify store is connected to CogniAgent. Select Add step and choose a trigger event – Action in App. In the list browse the Shopify integration.
Select a Trigger Event “New Abandoned Cart” and connect your Shopify Account to the Node. To do this you will have to find the API key in your Shopify account. Follow the provided instructions in the node to connect the Shopify account.
This step will fire every time a customer adds items to the cart and abandons the final purchase. Name the node something clear, like “Shopify – Cart Abandoned Trigger,” so your workflow stays easy to read as it grows.
Before doing anything else, you want to give the customer time to complete the purchase on their own. Click “Add Step” and select the Sleep node.
Set the wait time to 1 hour. The node is calculated in seconds. So 1 hour will be 3600 seconds. This is a critical buffer: without it, you risk sending a recovery email to someone who is still in the middle of checking out. One hour is the industry standard starting point, but you can adjust this based on your store’s average checkout time.
Name the node ‘Wait – 1 Hour Buffer’ and connect it to the previous step to be delayed from.
![]()
Once your trigger is configured and your data is flowing in, you need to tell CogniAgent exactly what information to extract and carry forward into the next steps. That’s what the Variable Node is for — it captures specific values from the incoming Shopify data and gives them clean, reusable names.
Add a Variable Node to your canvas and connect it to the previous step. Inside the node, define the following variables by mapping them to the corresponding fields from your Shopify payload:
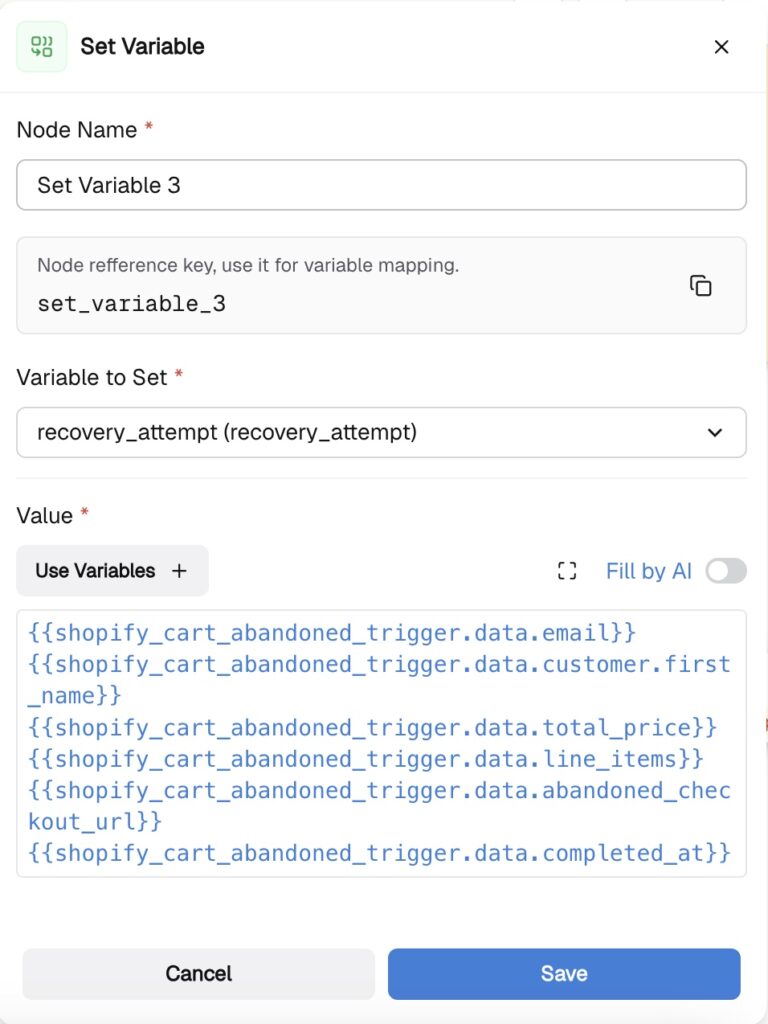
Once all variables are mapped, click Save.
After the wait, you need to check whether the customer went ahead and completed the order during that hour. Click “Add Step” and select the Condition node.
In the condition logic, connect back to your Shopify data and check whether an Order Completed event exists for the same customer email within the last hour. If your store logs order completions in a Google Sheet or CRM, you can also query that database here.
Configure the two paths:
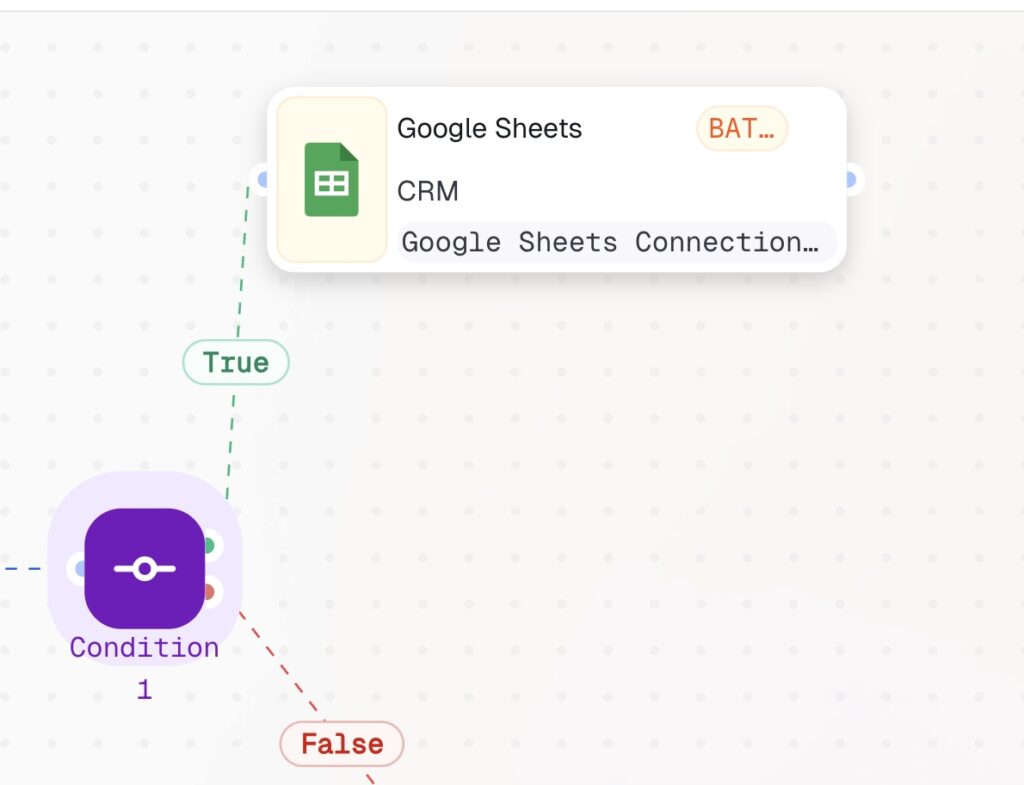
Name this node “Condition — Did Customer Purchase?”
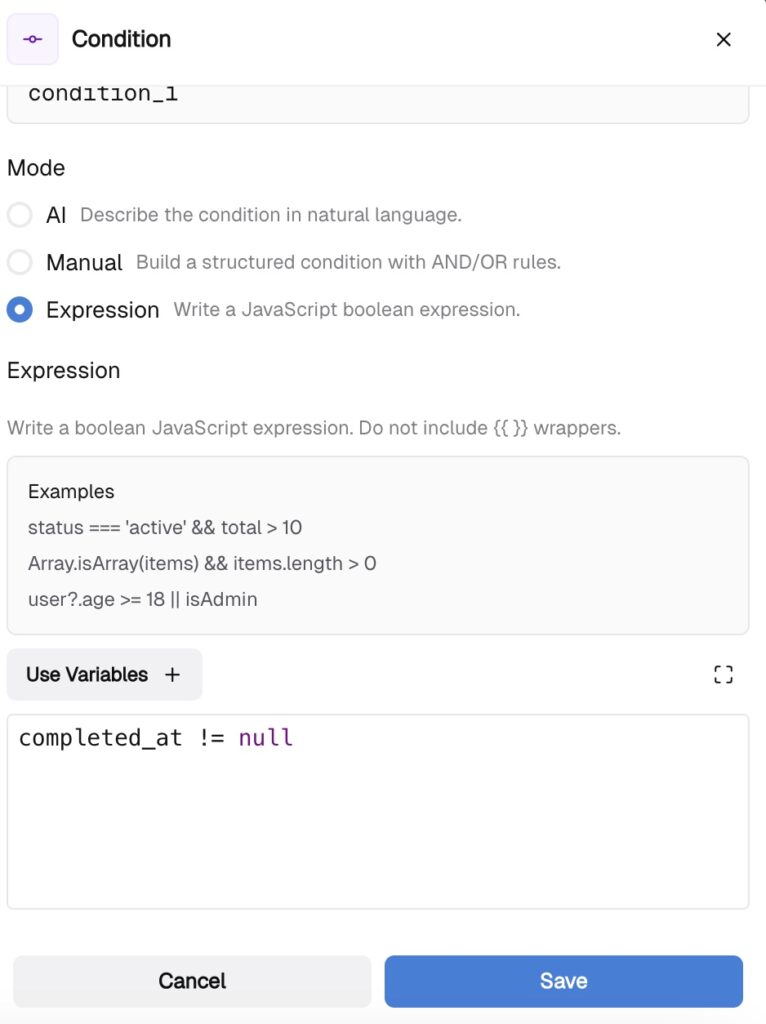
In the node you can describe the logic in AI mode, using simple language or use the expressions node as in the example.
Now it’s time to write the recovery email. Click “Add Step” and select the LLM node.
In the System Instructions, define the AI’s role clearly. For example: “You are an expert e-commerce email copywriter. Your job is to write friendly, persuasive cart recovery emails that feel personal and human, not robotic or pushy.”
In the User Instructions, be as specific as possible about what the email should contain. Tell the LLM to use the customer’s first name, reference the specific products left in the cart (pass the item names and prices from the Shopify trigger using variables, which we mapped out clearly in the previous steps), and keep the tone warm and conversational. For the first attempt, this is a soft reminder — no discount yet, just a gentle nudge.
Set the Structured Output to return three fields: subject, body, and customer_name. This makes it easy to plug the output directly into the email-sending node later.
Name this node “LLM — Generate Recovery Email (Attempt 1).”
![]()
After the LLM generates the personalized recovery email, it’s time to send it. Click “Add Step” and select the Action in App node. Choose Gmail as the app and set the action to Send Email.
Connect your Gmail account and map the fields using variables from the LLM node:
In the To field, click “Use Variables” and select customer_email from the Variables section — this is the clean variable you set up at the beginning of the workflow.
In the Subject field, map it to the structured output of your LLM node.
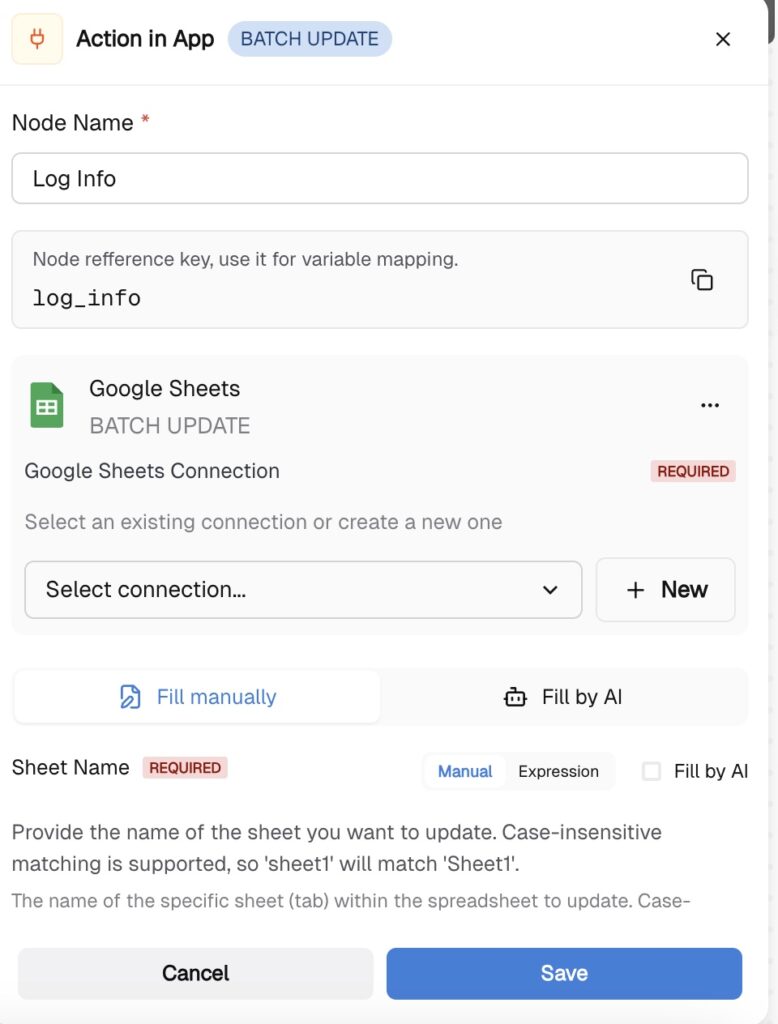
After the email is sent, you want to log every attempt so you can track who was contacted, when, and how many times. Click “Add Step,” select Action in App, and choose Google Sheets. Set the action to Batch Update or Add a new Row. You can check this guide to learn the configuration in detail or this guide if you log the data in HubSpot.
This step gives you a clean log of every recovery email sent, which you can use later to measure your recovery rate and tune the workflow.
Congratulations! Part 1 of the workflow is done! Push start! In the next guide, we will learn how you can enrich the workflow by adding the logic of giving customers 2 more discounts to complete the final step.
Follow other guides to learn how you can automate the processes from day one!
 Jun 04, 2026
 4 min read
 Jun 02, 2026
6 min read
Jun 02, 2026
6 min read
 May 14, 2026
6 min read
May 14, 2026
6 min read